Collective forces continued their advance in northern Caerdonia down towards the capital Cabolt. Jendari Rangers, Rin Empire, Jendari Defence Army, Tigers and even Dragons assaulted House Baronor positions held by Baronor Guards, Knights and Solar Raider Mercenaries.
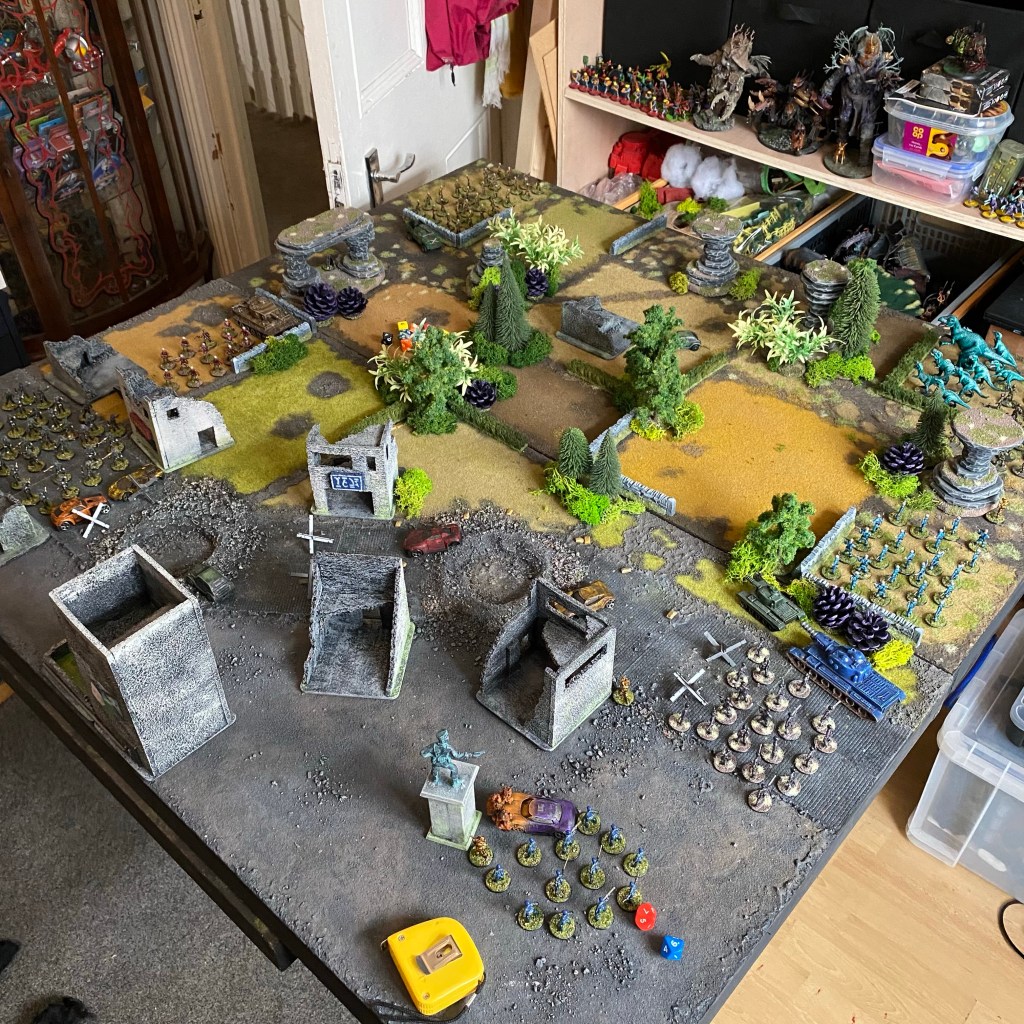
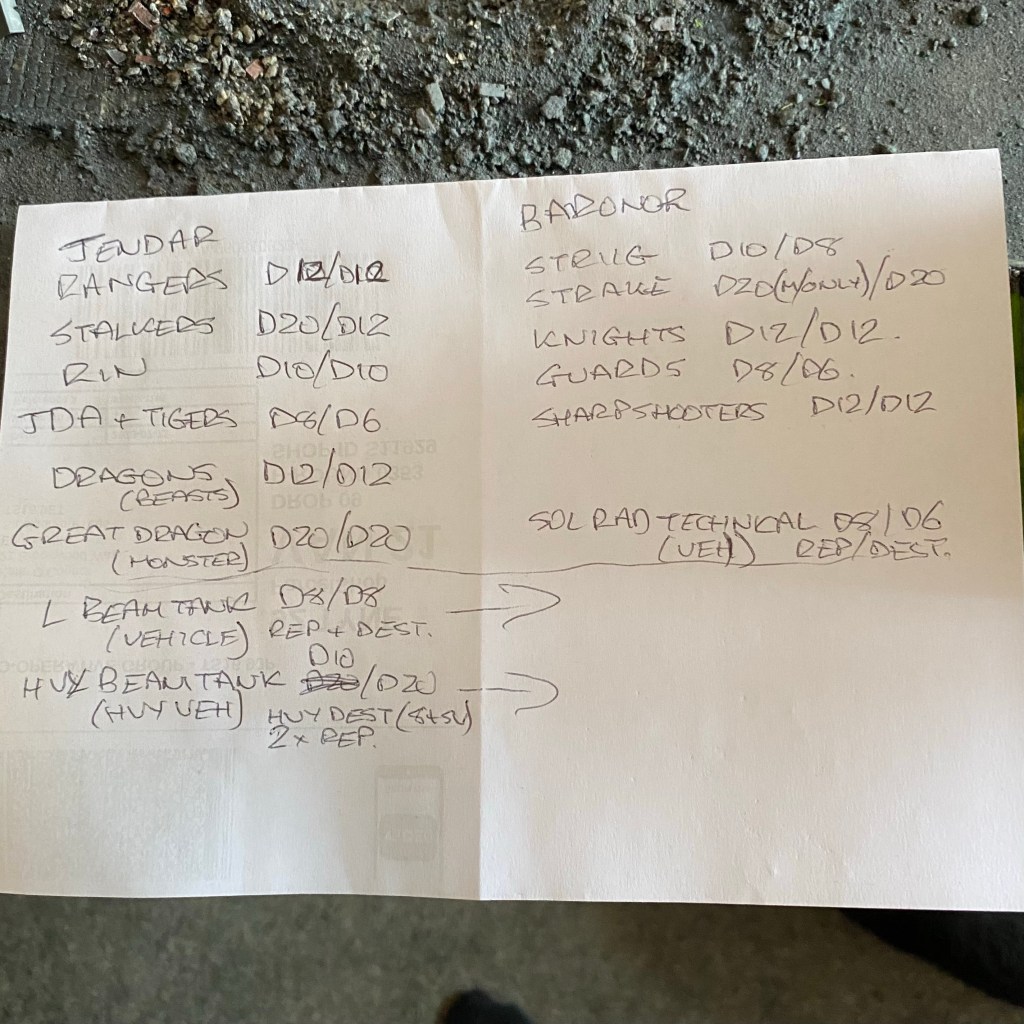
The stats required and army lists are minimal with the latest version of Deathzap and the simplicity of the system allows big games to be played really quickly without losing that feeling of a skirmish, which is really what these ‘battles’ are. I’m basically playing Donald Featherstone’s Close Little Wars but using polygonal dice to differentiate between qualities of troops. A save against small arms fire is always on a 4+, but an elite soldier with good shields and body armour will make that save using a D12, whereas massed conscripts with old, outdated or just basic equipment may make that save on a D6.
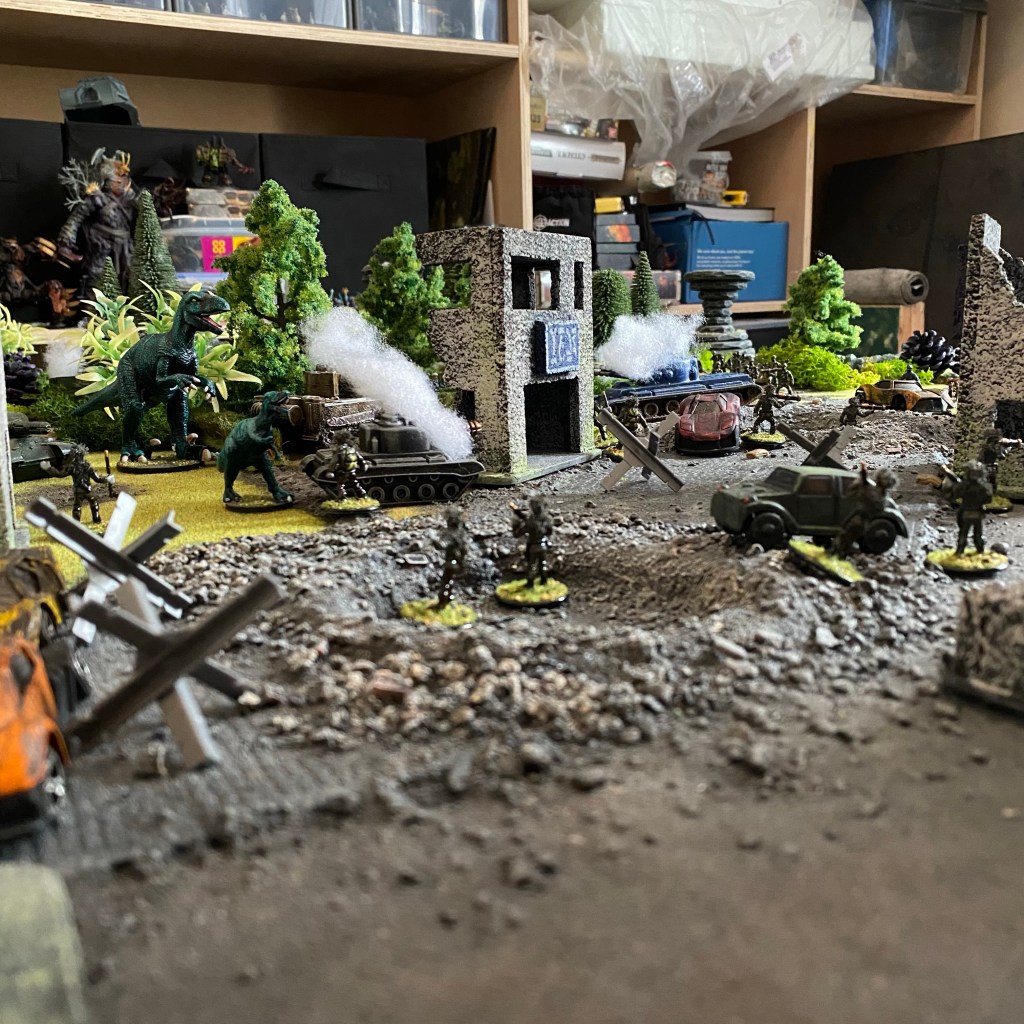
A forces drew closer a deadly tank duel erupted in the middle of the table.

As the Guards crumpled on the right flank Jendari forces swang left, the Dragons sneaking behind enemy lines.

The Solar Raider Chieftain charged a Jendari Ranger attempting to take cover in a crater. Despite rolling a D20 in melee to the Rangers D12, the Ranger still successfully defended himself, battering the Chieftain to death with the body of his repeater.

A Knight darted from cover, hoping to stop the Great Dragon charging the Baronor flank with his destroyer. But before he could fire, the Dragon melted him with its acid spit.

The Baronor Sharpshooter also fell back under the Dragon onslaught.

With the Knight now also devoured the remaining Raider Mercenaries took up defensive positions.
The Raiders held out incredibly well, making save after save on their D10s, eventually they were whittled down and Collective forces pushed through.

Next will be the Siege of Cabolt. I need to touch up some figures, and maybe recreate my Rin Empire squads. I’ll definitely need some more terrain by then too, maybe a city wall?
Again here are the rules as they currently stand, I find little bits to add and tweak each game:
DEATHZAP
The game then is played in turns, each turn being made up of 2 phases and played in the order listed below.
PHASE 1: Movement
Roll off to determine which side moves first. Half Infantry movement if they need to cross an obstacle or any part of their move is across rough ground.
Infantry and Heavy Vehicles – 6”.
Vehicles and Beasts – 12”.
Monsters – 9”.
Monsters and Vehicles Ramming: When a Monster or Vehicle moves they can Ram instead. Move them in a straight line up to their normal move distance, any Non-Monster, Non-Vehicles make saving throws (4+) if they are in their path, any figures that fail their save are killed, any that survive are moved by the shortest route until they are out of the Monster’s/Vehicle’s path. Their Ram stops if they move into another Monster or Vehicle when a normal melee combat is fought.
Melee Combat: When two figures come into base to base contact immediately resolve their fight (unless they are a Monster or Vehicle charging or ramming Infantry and Beasts). Roll the melee die of both fighters, with the higher roller killing their opponent. Reroll ties. Melee dice are the same as dice for shooting: Basic D6, Regular D8, Veteran D10, Elite D12, Heroes D20. Beasts get a +2 modifier and Monsters a +4.
Vehicles in Melee Combat: Vehicles get a +2 modifier and Heavy Vehicles a +4. If a vehicle wins the combat and their opponent is infantry or a beast then neither are killed, and the infantry or beast figure backs off 1”.
Multiple Opponents: If you want you can have multiple attackers face off against a single target in melee. Declare that is your intention and then move as many figures into base to base contact with a single target as you want. Only roll 1 die for each side, but add 1 per additional combatant. All combatants are killed on the larger side if the combat is lost.
PHASE 2: Shooting
Both sides fire, with Heroes going first, then Elites, then Veterans, then Regulars and finally Basics. Shooting is resolved for both sides simultaneously within each skill step, with casualties being removed at the end of each step.
Normally roll 1 die to hit for each gun firing:
Basic shooters roll a D6, Regulars D8, Veterans D10, Elites D12 and Heroes D20.
4+ to hit a target in the open.
6+ to hit a target in cover.
If a hit is achieved the target makes a saving throw needing:
4+ if hit by Small Arms, Repeaters or Grenades.
6+ if hit by a Destroyer or Stalker Rifle.
8+ if hit by a Heavy Destroyer.
2+ if hit by anything but while inside a bunker and the shooter is outside.
Targets with No Armour or Shields roll a D4, Light D6, Medium D8, Heavy D10, Very Heavy D12. Monsters and Vehicles can only be harmed by Destroyers or Grenades.
Firing Repeaters: Repeaters can make D3xD3 shots per shooting phase.
Throwing grenades at enemies outside of buildings: 12” range maximum. Roll to hit as normal, and if a hit is achieved then all enemies within 2” of the figure hit are also automatically hit.
Firing destroyers or throwing grenades at buildings: 4+ to hit the building, 6” range maximum for grenades (you need to be closer to accurately lob a grenade through a window etc). All enemies inside the building then make saving throws (4+). For larger buildings divide them up into sections, only hitting all figures within a section.

I like your use of different dice for various classes of troops, something I once considered doing..
Would love to see a gallery of all the different uniforms of your poundland warriors