Based on the last post, I thought it would be a good idea to post some examples of how shooting works in my latest version of Deathzap as the rules as written can seem far more complicated than they really are.
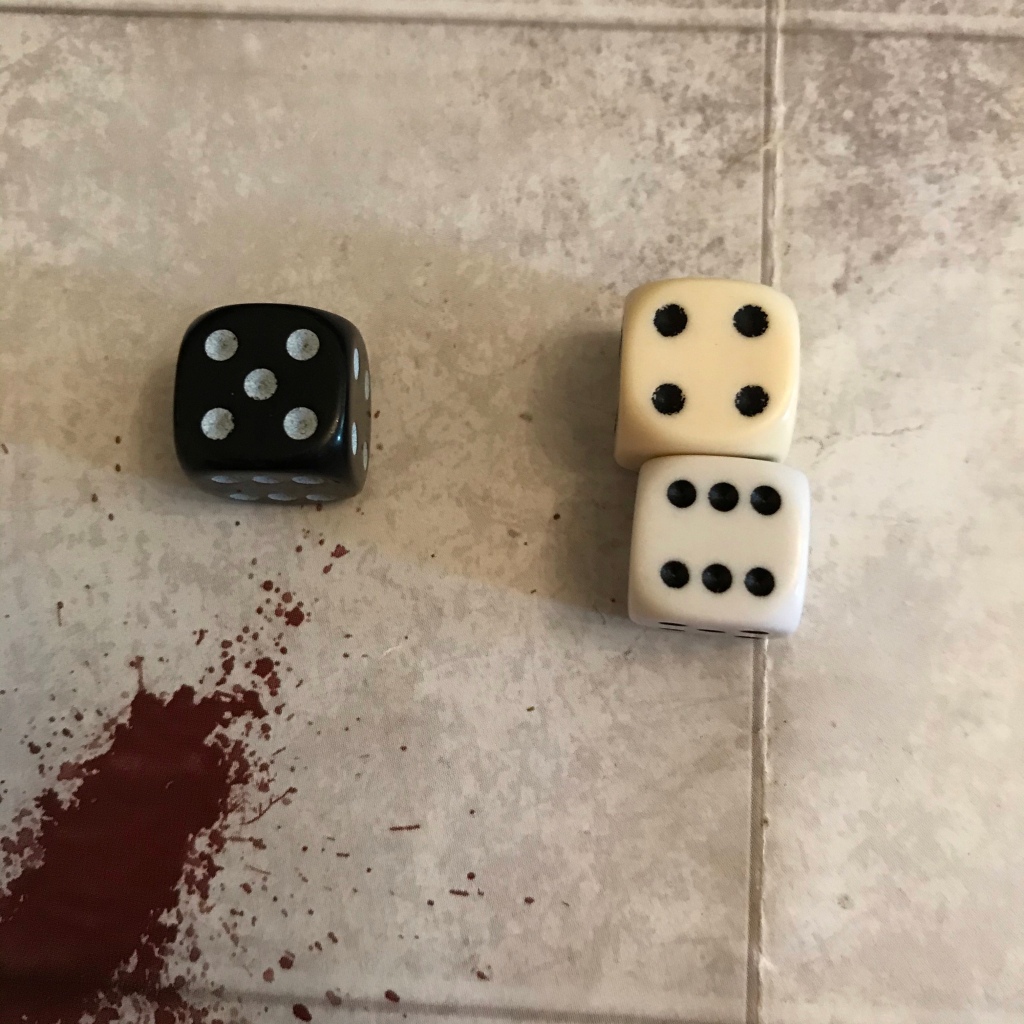
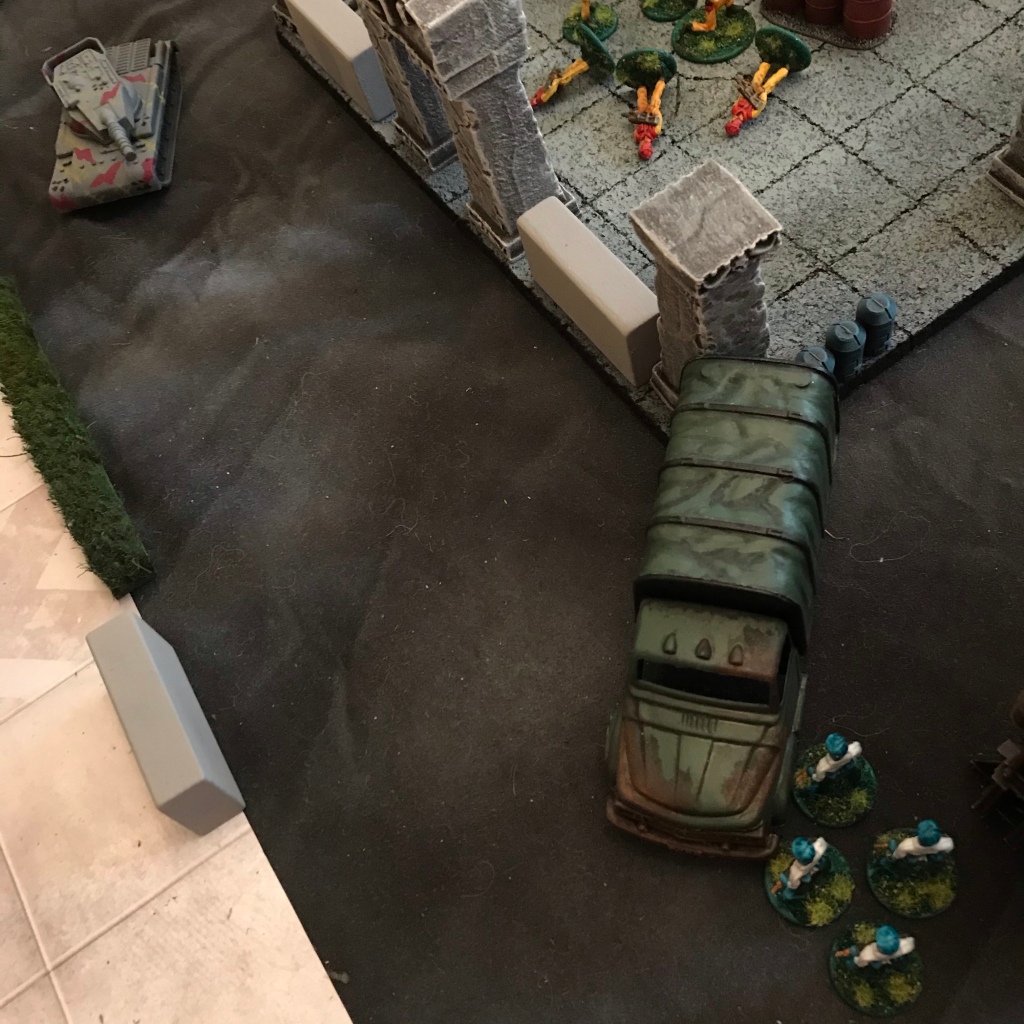
Example 1: A squad of Reddinists open fire on some Allegiance Riflemen.
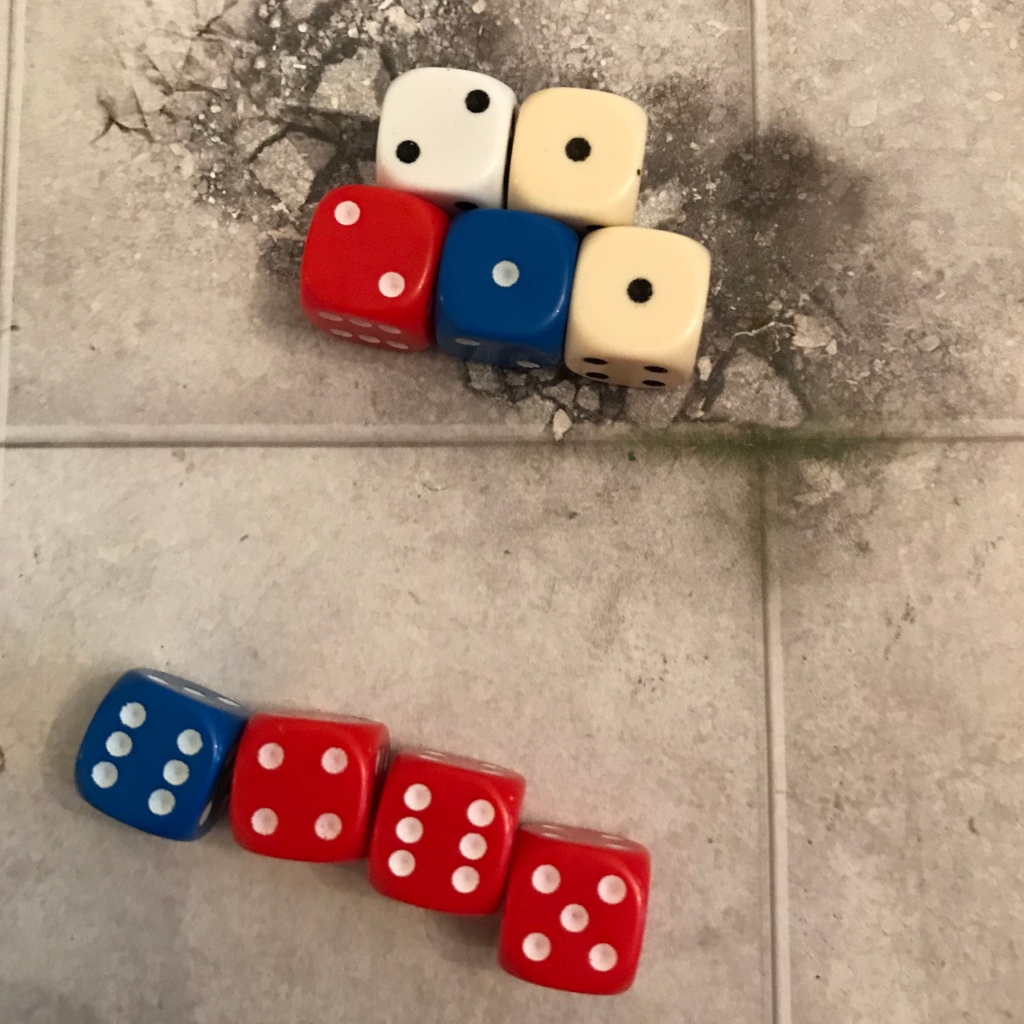
The Reddinists are armed with 5 Repeaters (Shots 2, Strength 1, Damage 1), a Medium Repeater (Shots 6, Strength 1, Damage 1) and a Destroyer (Heavy Weapon, Shots 1, Strength 6, Damage 3).
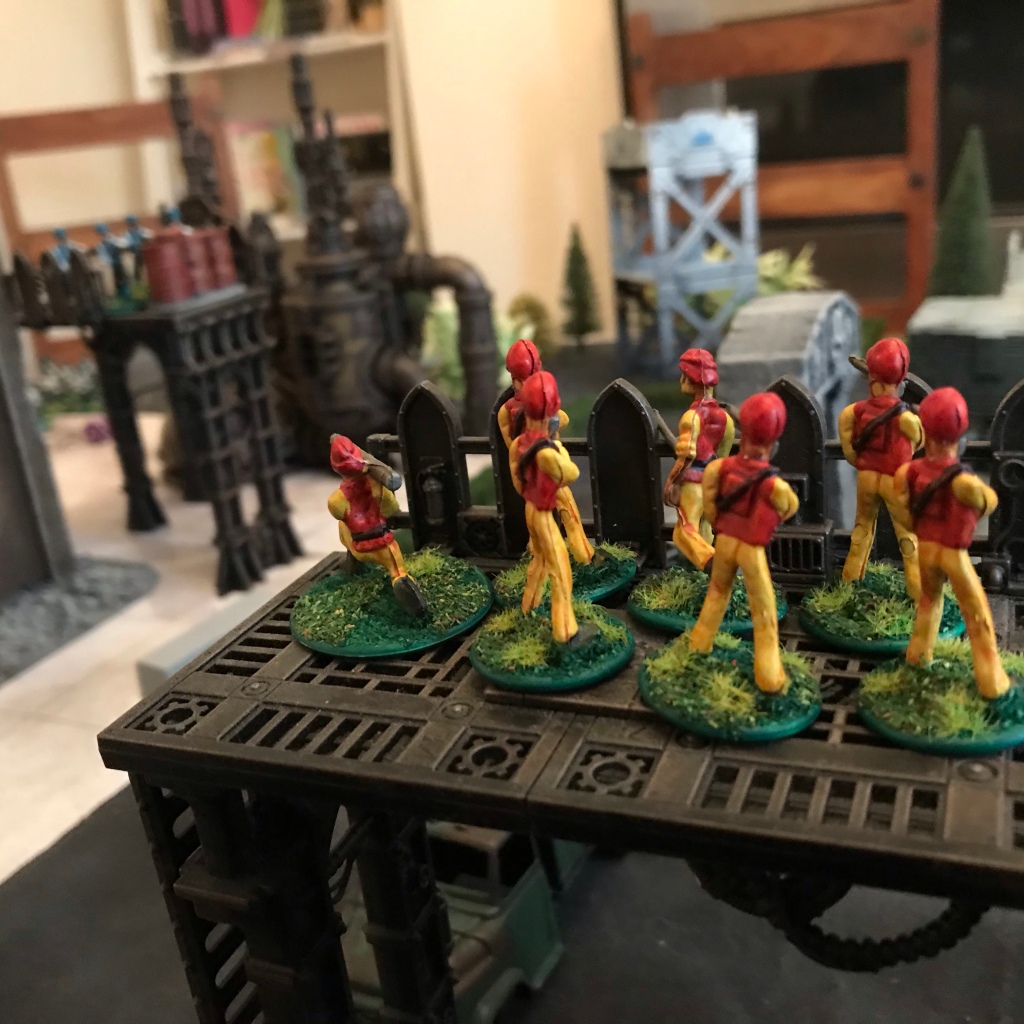
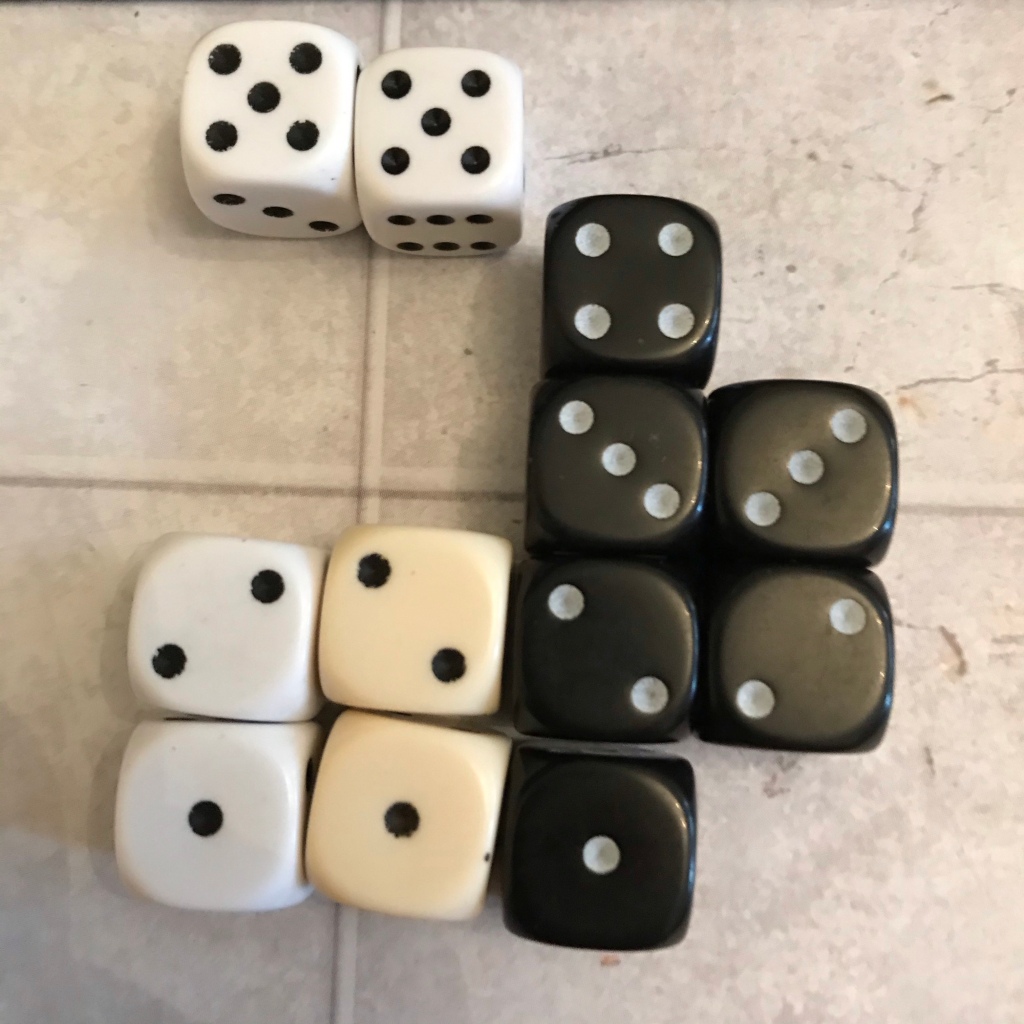
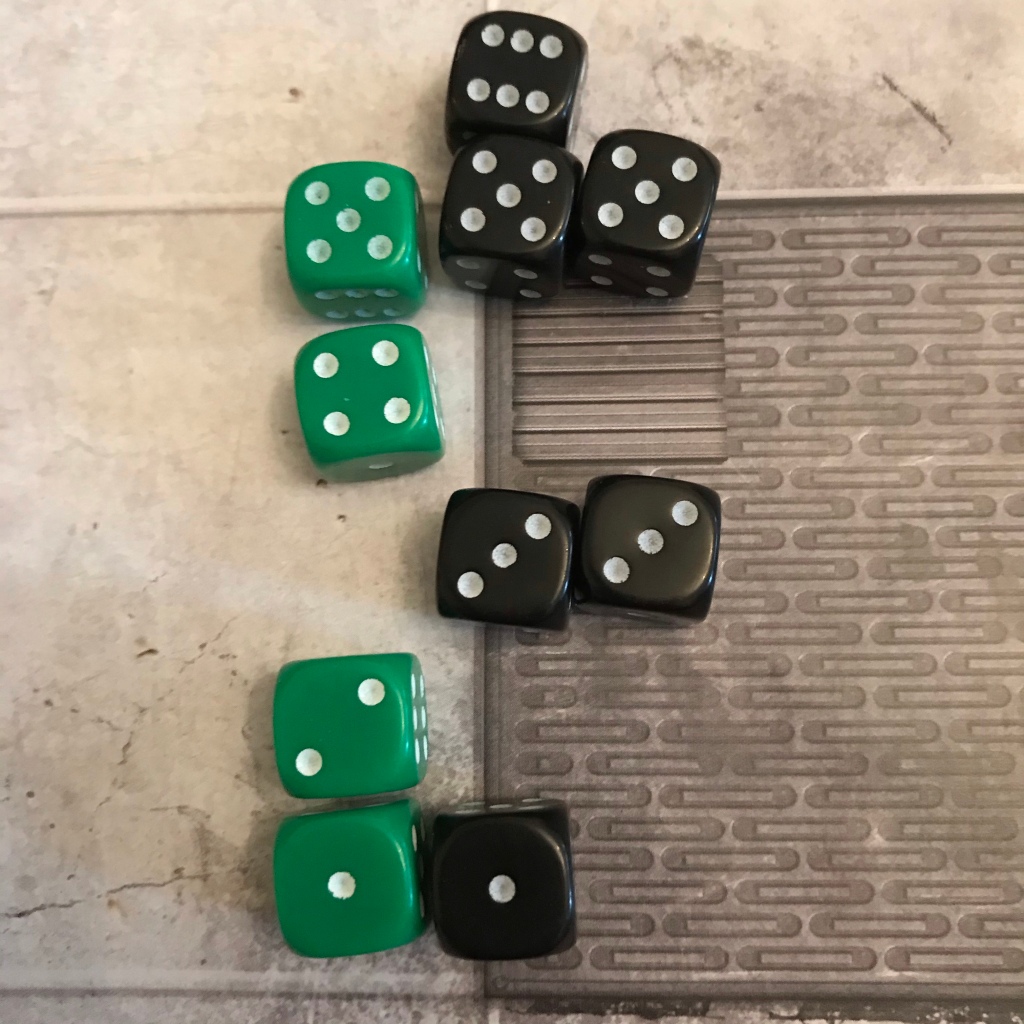
The Allegiance Riflemen have a standard defence of 2 are just over 12″ away (Defence +2) and are in hard cover (Defence +2). Below you can see all the dice, the green for the Medium Repeater, the red for the Destroyer and the white for the Repeaters. On the right the black dice are for the Allegiance unit’s defence.

First all the dice are rolled and the defending player is attempting to block the attacker’s dice. Any dice rolled by the attacker that are a value rolled by the defender are blocked. A single die rolled by the defender will block all the dice of the same value rolled by the attacker. Below you can see that the Destroyer has not been blocked, along with a single Medium Repeater shot and 5 Repeater shots.
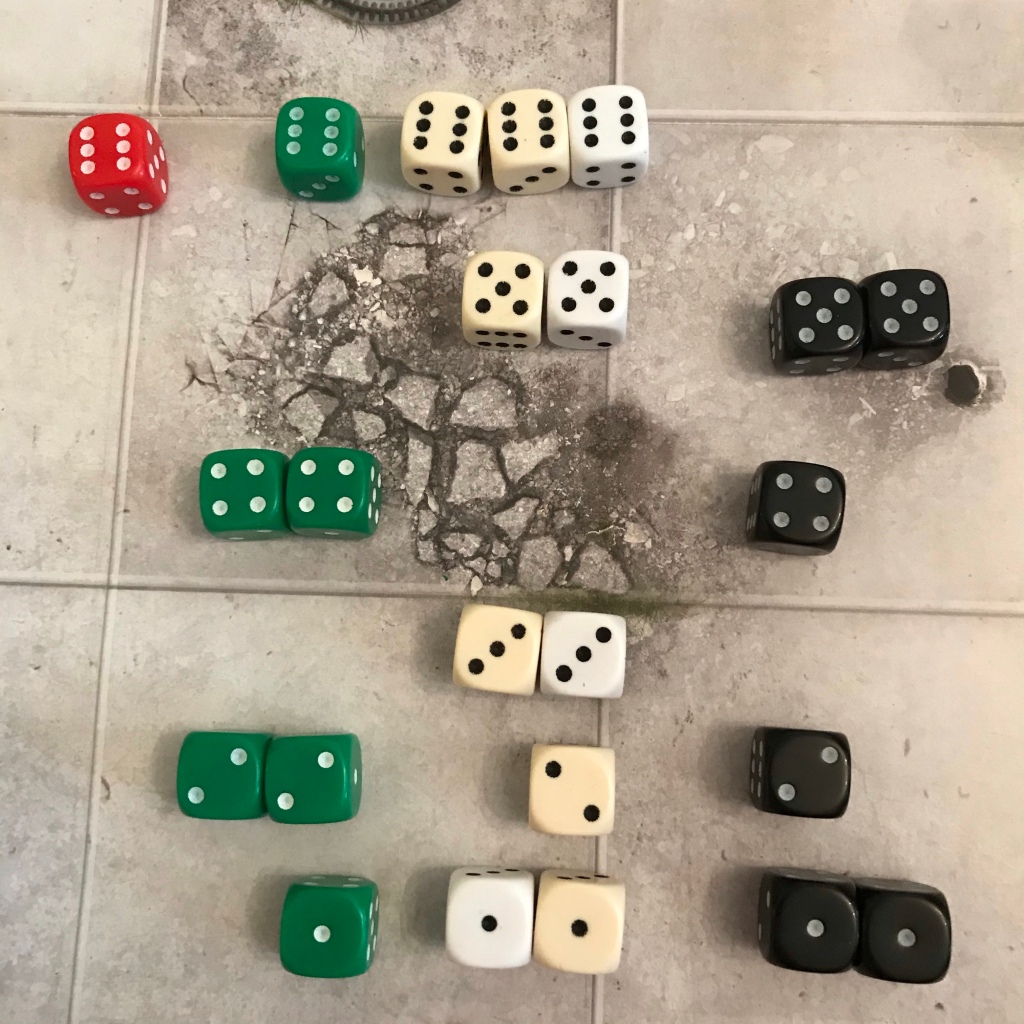
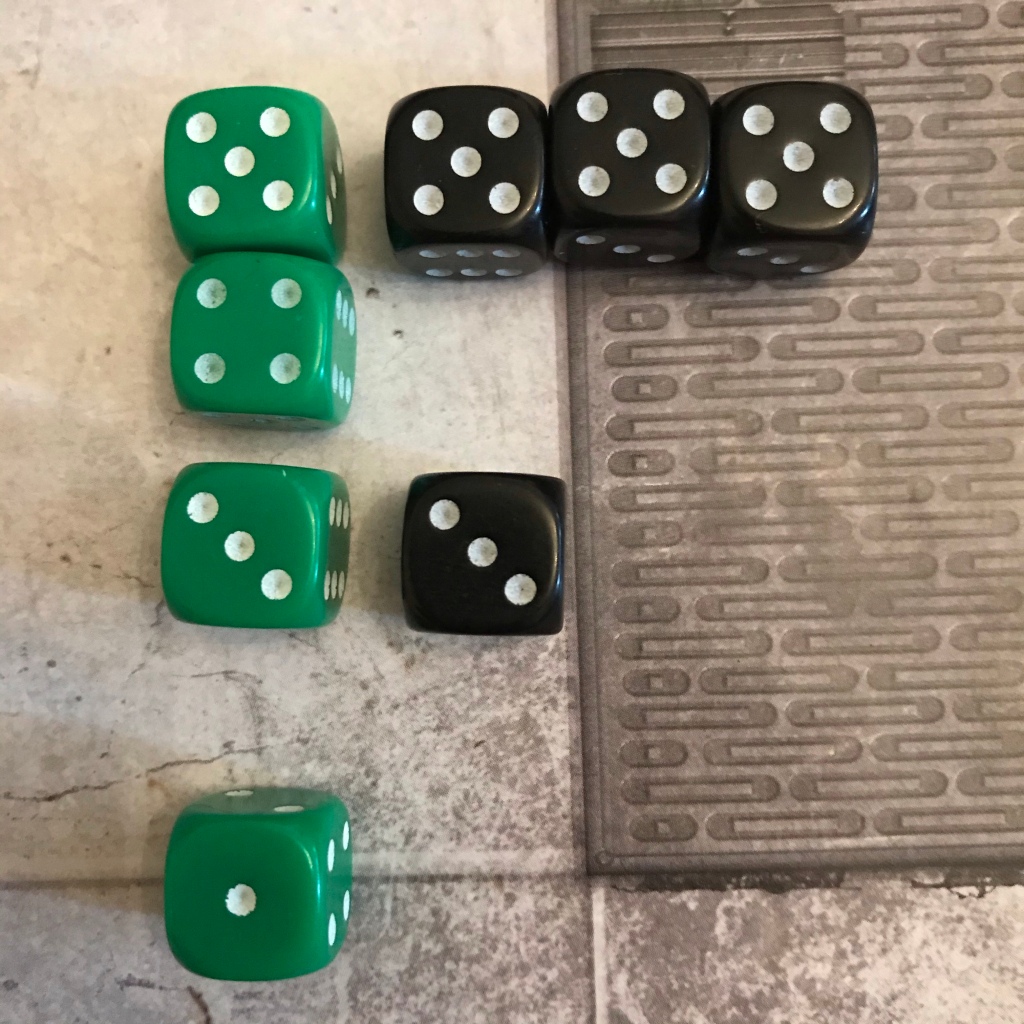
Any dice that hit are multiplied by the strength of the weapon being used. For the Repeaters with a Strength of 1 this makes no difference. That single Destroyer hit however has now multiplied to 6 dice. I also made a mistake here and included three dice for the Medium Repeater when there should only be 1, though since they all fail the next roll it’s fine. While the first dice roll represents the effects of range, cover and target type, this second roll is all about converting that fire into actual damage on the target.
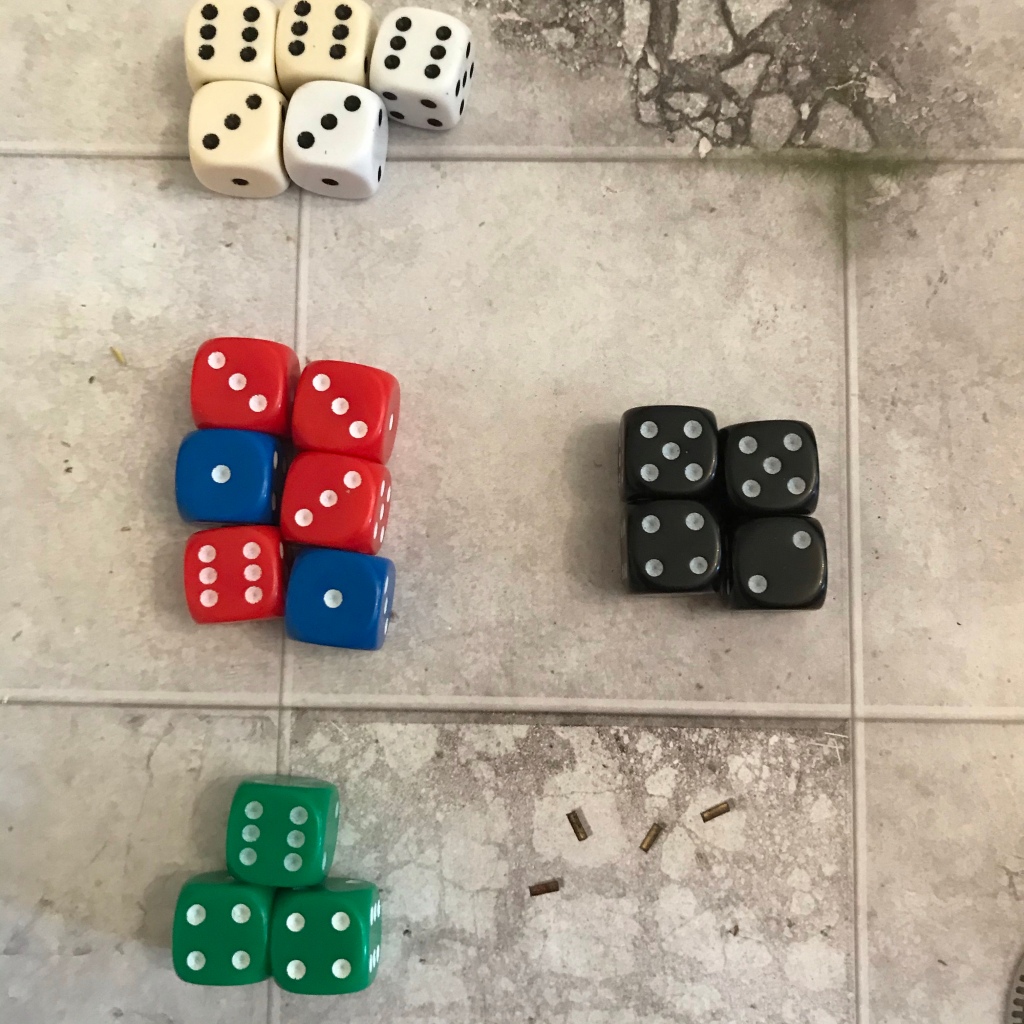
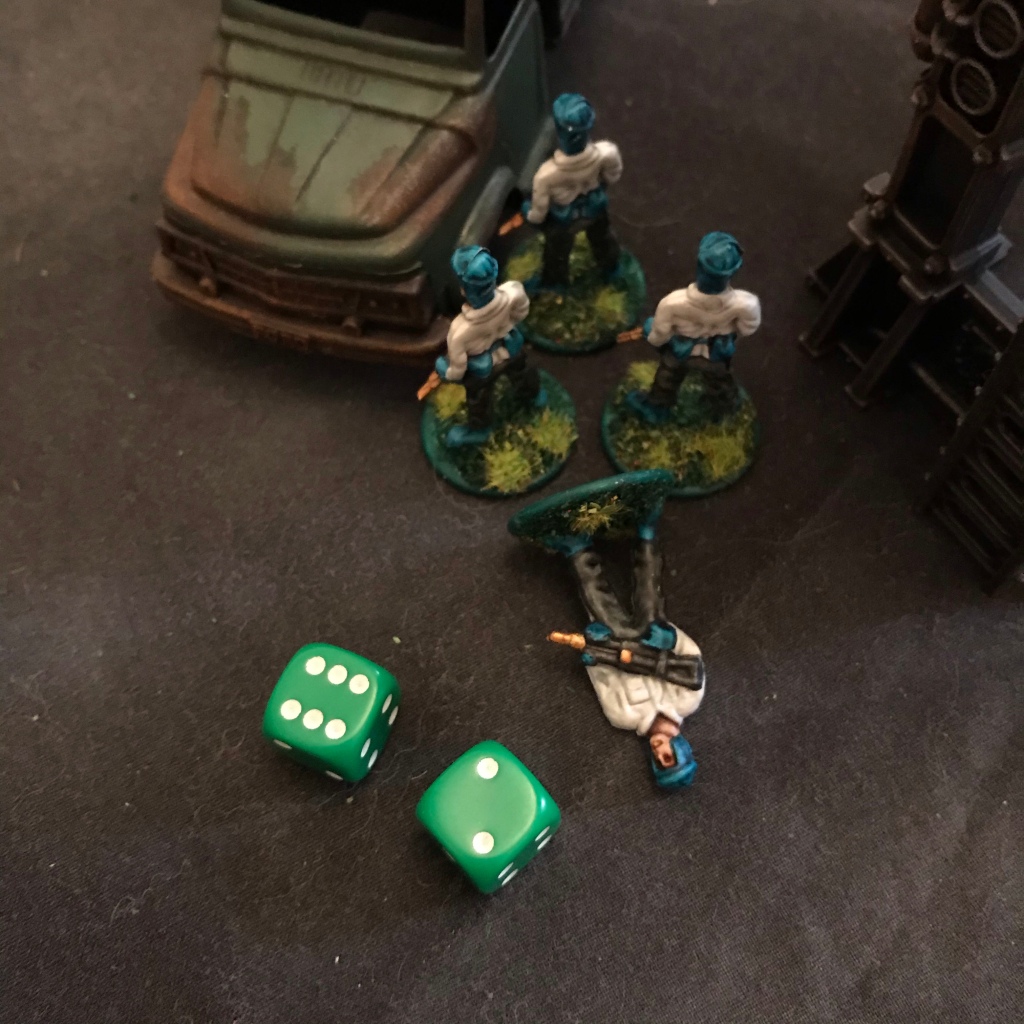
Somewhat fortunately and unfortunately for the Allegiance Riflemen the Destroyer’s explosive capabilities caused them some serious damage. Two destroyer hits struck home as did three Repeater shots.
The two Destroyer hits translate to 6 saving throws since they are Damage 3 each and with the three Repeater hits the Riflemen have to make 9 4+ saving throws. Five of which they failed and the unit was wiped out. A bit bloody I know, but I did set the Reddinists up rather close with the intention of allowing you to see multiple weapons working together.
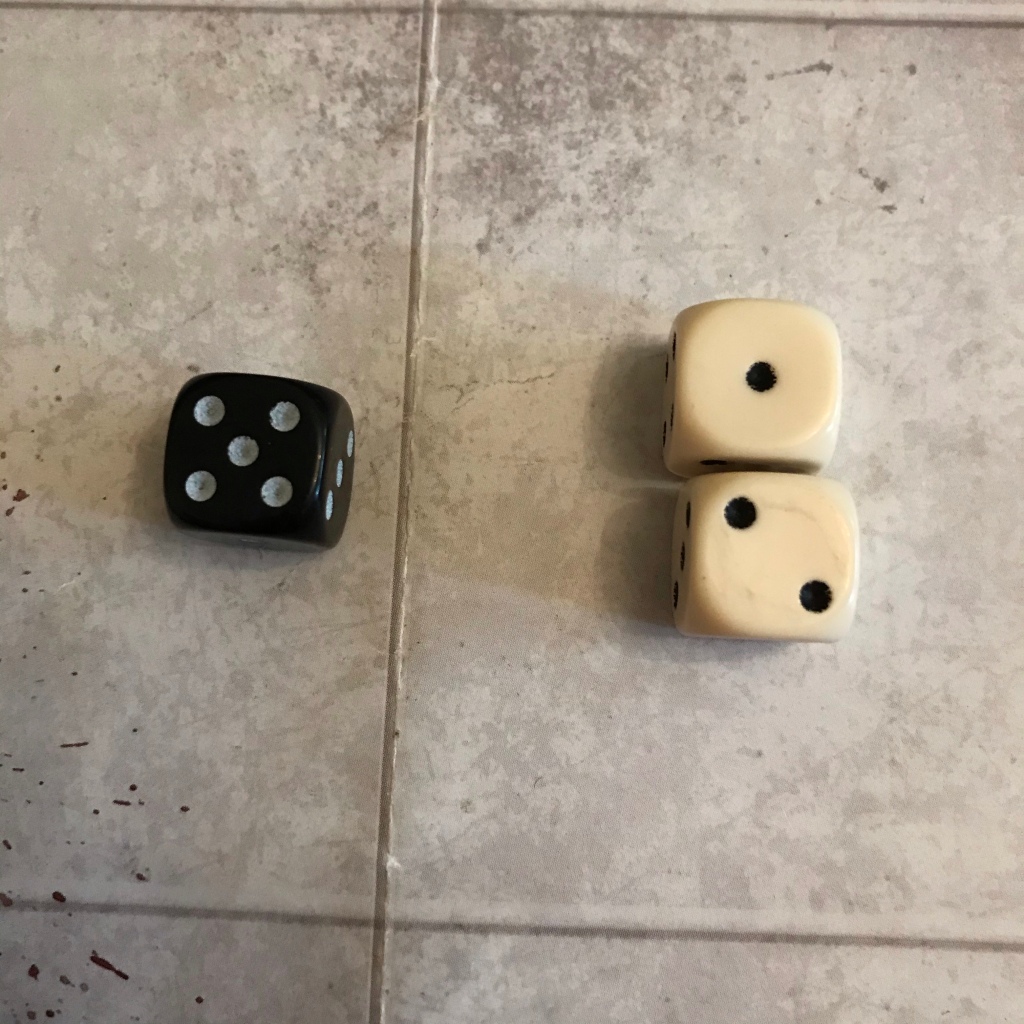
Example 2: A Reddinist Snail Tank opens fire with it’s Dual Destroyer Cannon (2 Super Heavy Weapons with Shots 1, Strength 6, Damage 6 each) against an Allegiance Wartomata.
The Wartomata has a defence of 5, is in the open (Defence +0) but 15 inches away (Defence +2) giving him a total defence of 7. The Snail has 2 shots.
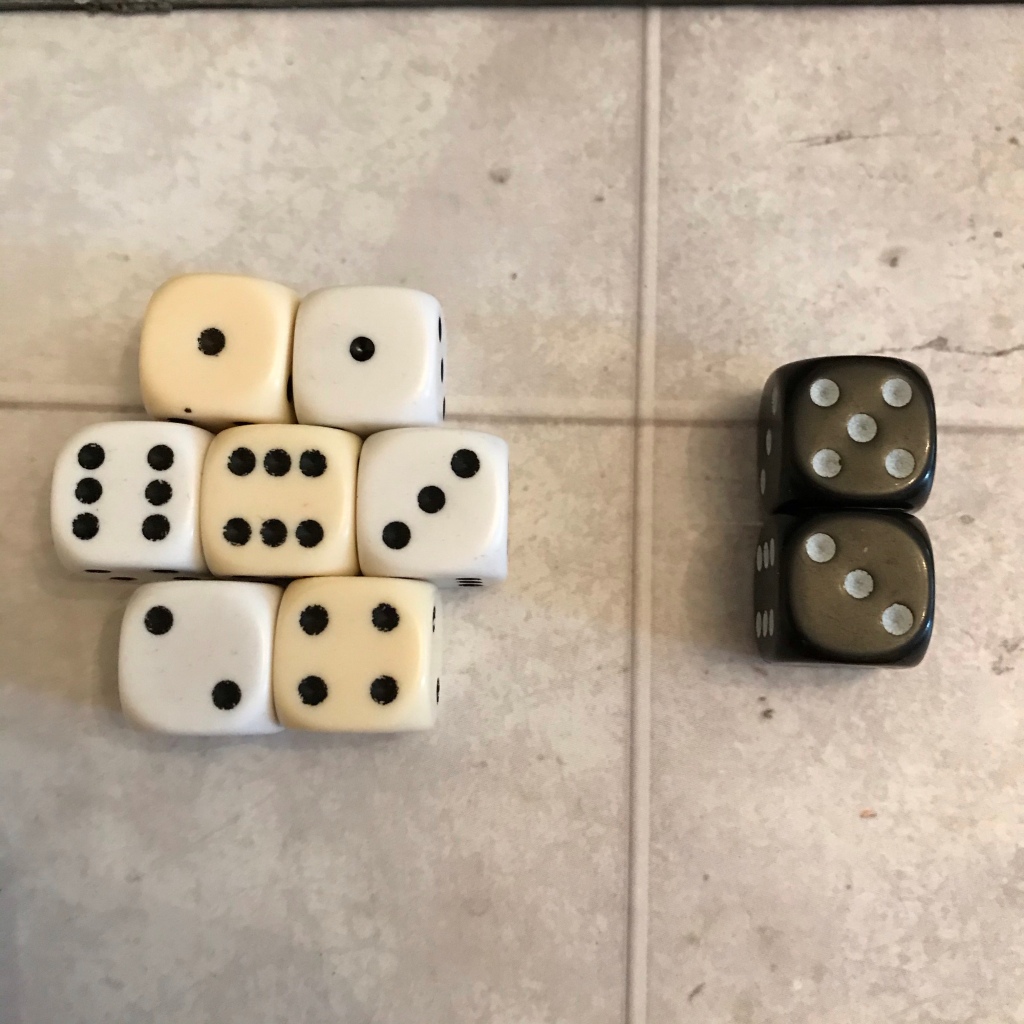
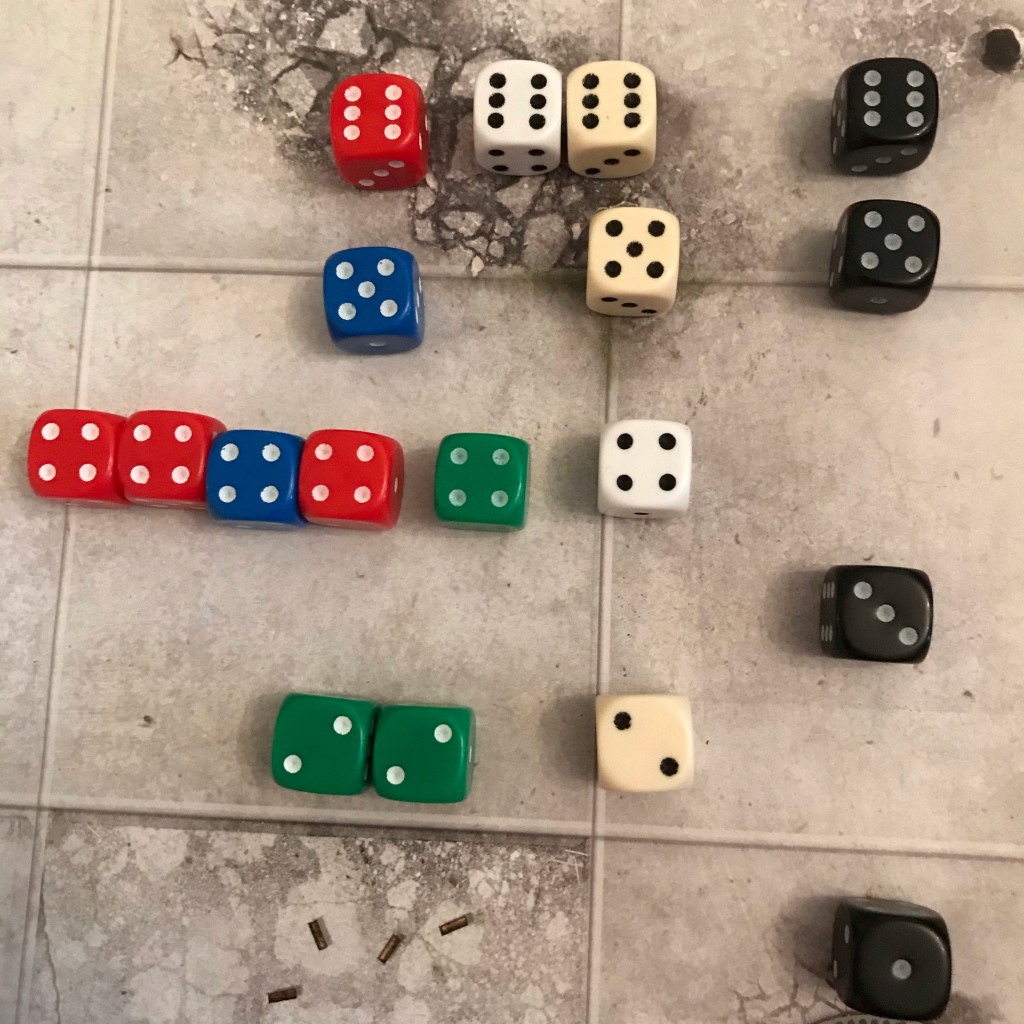
After all the dice are rolled the Wartomata only managed to block one of the dice.
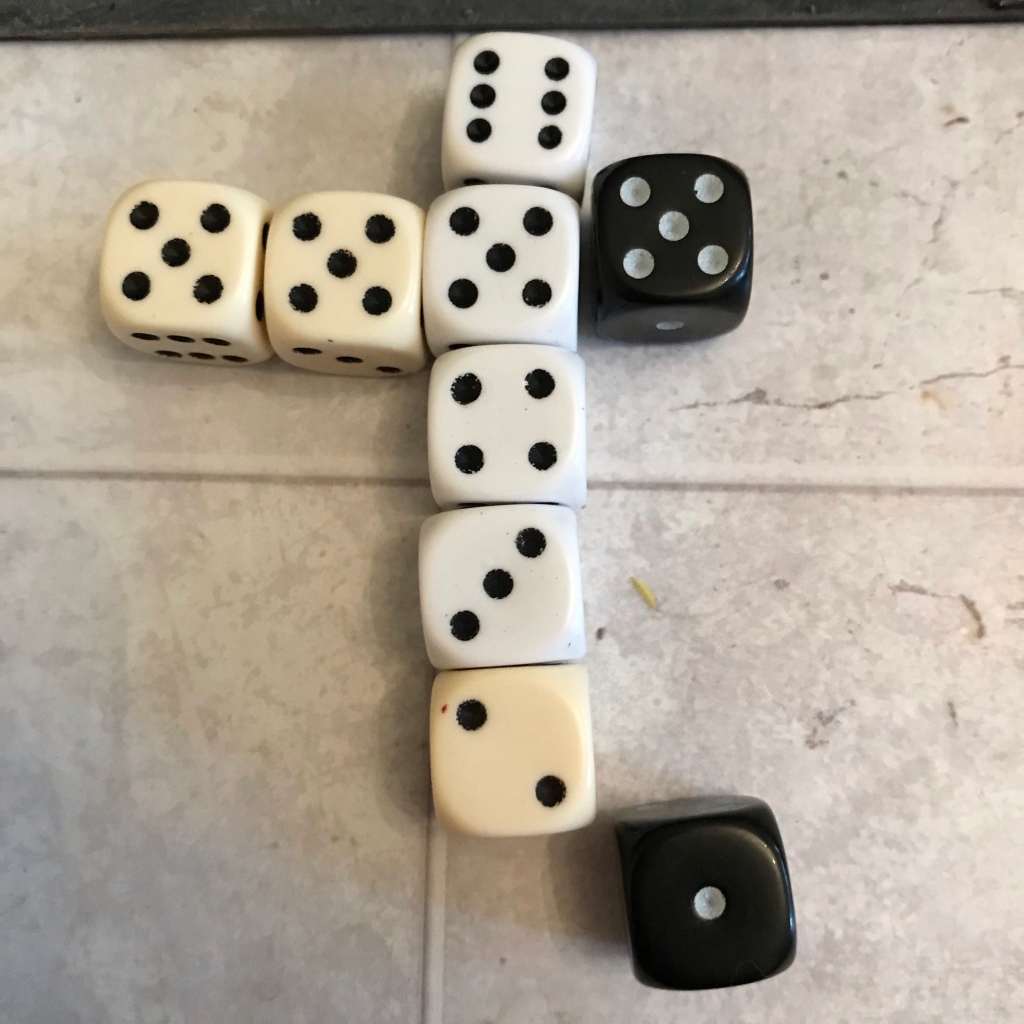
That single Super Heavy hit translates to 6 dice the Wartomata needs to avoid to not suffer any damage. The Wartomata is size 6 and so rolls 6 dice.
3 dice could not be avoided and so the Wartomata has to rely on its shields to save it. 18 shield saves are made as the Super Heavy hits are also Damage 6. 5 failures means the Wartomata loses 5 wounds. Fortunately he has 12 total so he’ll live for now!
Example 3: The Reddinist Squad in the square attempts to eliminate the Allegiance Sharpshooter on the tower.
The Reddinists are armed identically to the squad from before (5 Repeaters, 1 Medium Repeater and 1 Destroyer). The Sharpshooter is 3 defence standard, 21 inches away (+3 defence) and the tower gives him hard cover (+2 defence).

Only two Repeater shots were on target, fortunately the Destroyer harmlessly whizzed past!
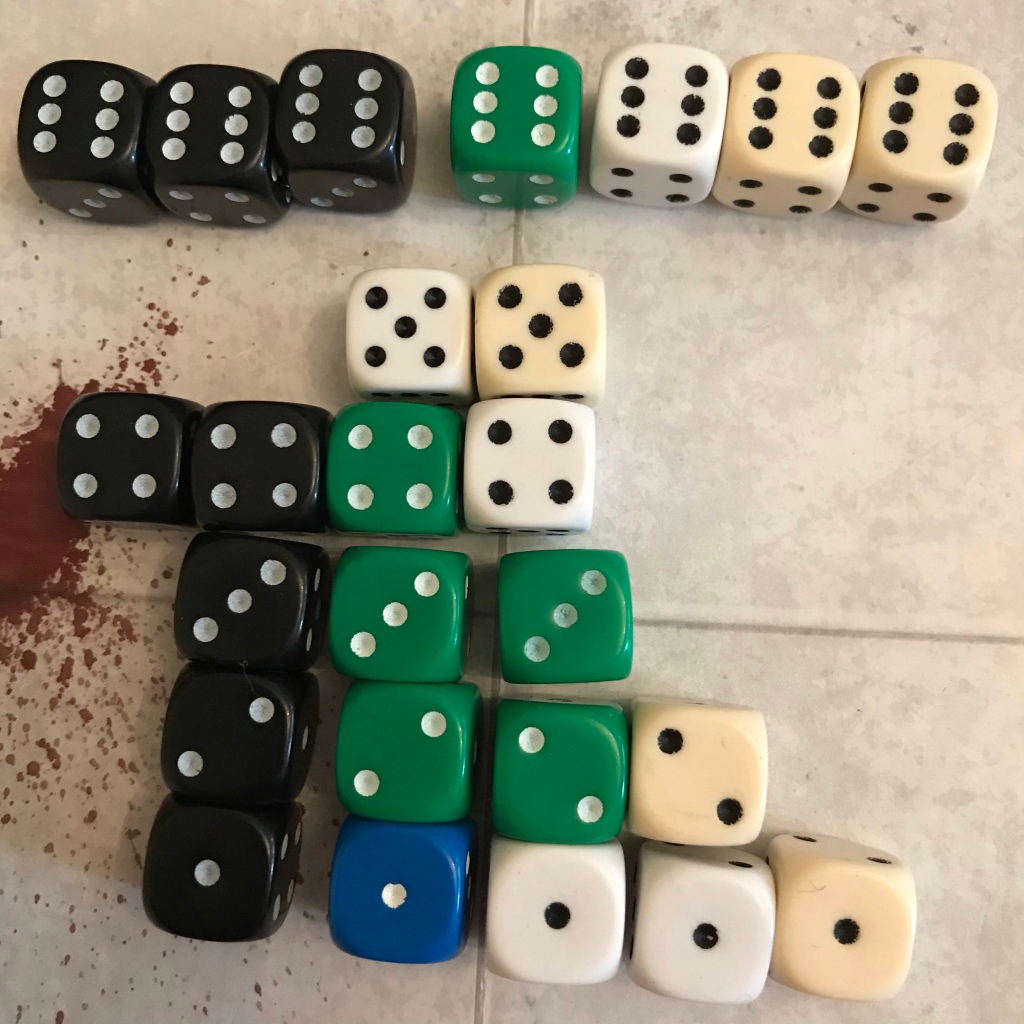
The Sharpshooter at size 1 is also pretty difficult to take out even if you do score a couple of shots in the right area. He avoids those Repeaters with ease.
But now the Sharpshooter annoyed and a little dusty returns fire with his Sharpshooter Rifle a weapon unique to the Allegiance of Gnossos (Shots 1, Strength 3, Damage 3). The rifle also has the bonus rule that range and cover are ignored. So one Sharpshooter shot to the Reddinists’ defence of 2.
The Sharpshooter hits and since his weapon is boosted with Arc technology it has some small explosive capability. That single shot translates to 3 hits the Reddinists need to avoid, but with a full squad of seven men they wont all go unscathed.
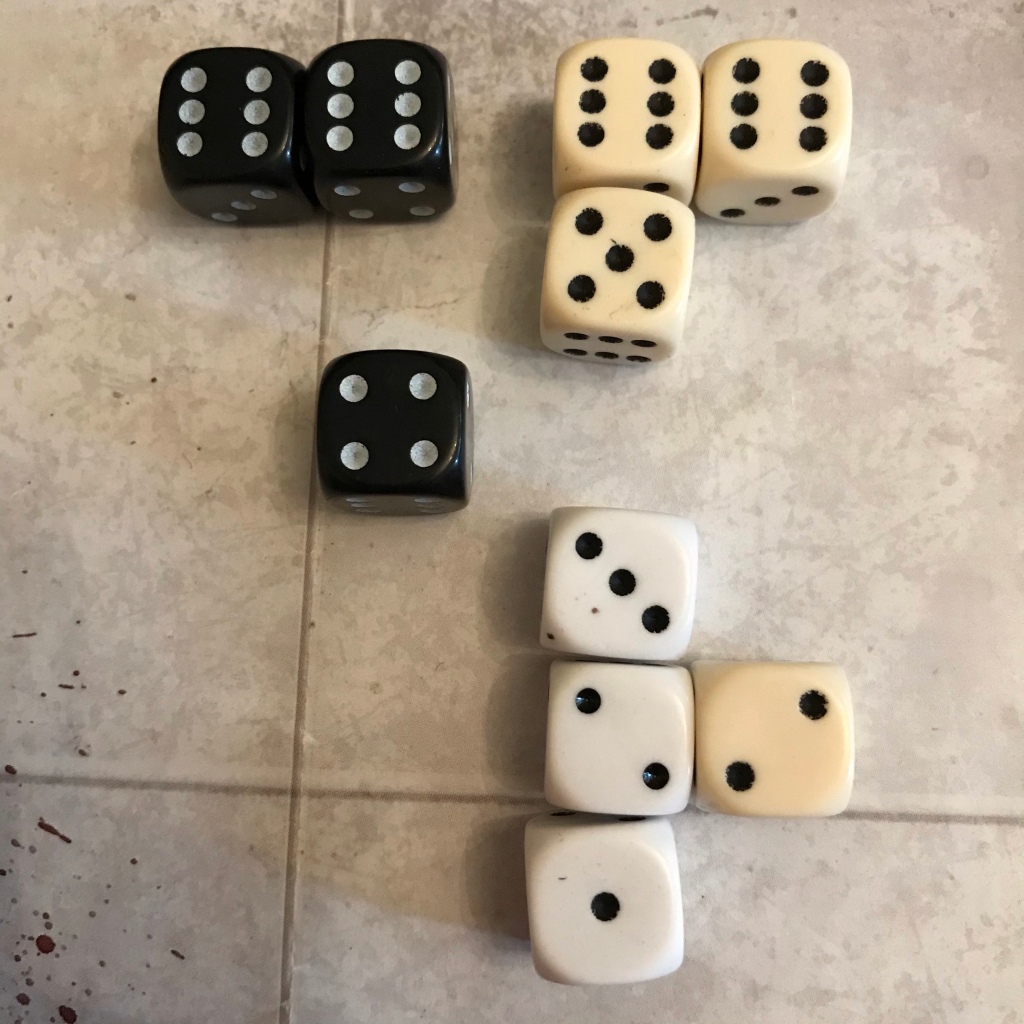
Two hits translate to 6 saves since the Sharpshooter’s rifle is Damage 3. Saving with their Shields on a 5+ the Reddinists are lucky to only lose 3 men. They won’t go annoying any Allegiance Sharpshooters again anytime soon!
Example 4: Not far from their fallen commrades a Reddinist Arc Tank attempts to take out an Allegiance Repeater squad. The Arc Tank is armed with an Arc Weapon (Shots are equal to the target’s size, Strength 2, Damage 1).
With a target at size 4 only 4 shots are rolled for. The Allegiance unit has Defence 2 standard, is 19″ away (+3) and is in soft cover (+1).
Two shots were on target. Do they have the potential to damage?
The Allegiance unit couldn’t avoid two of them and failed a single shield save.
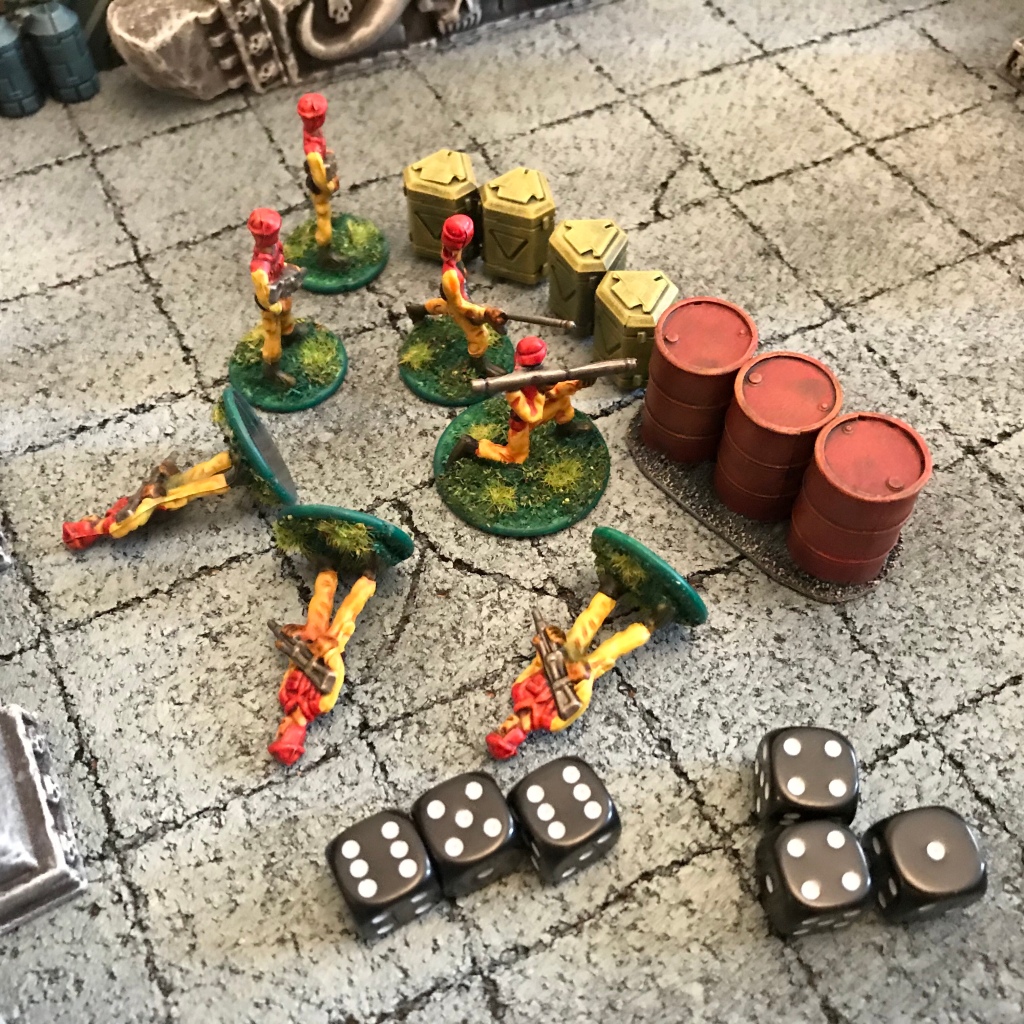
I hope those examples help you make more sense of the shooting rules in my latest version of Deathzap. The key to the rules because I know from these examples they seem bloody, is that as infantry units take casualties they actually become far harder to deal with. In a single test game I played a lone Reddinist armed with a Destroyer wreaked havoc on an entire Allegiance force. He had luckily passed his morale check when the rest of his squad was destroyed (must have been a grizzled veteran), and took out an Allegiance squad with a lucky shot and then proceeded to do some decent damage to the Wartomata. In the end he succumbed to massed fire power, as the Wartomata and an Allegiance squad had to level the building he had taken refuge in. It’s something I’ve never seen happen in a game before at least not to that extent, but is something I do think reflects reality. A single infantryman with an anti tank weapon can be a real nightmare.

Thanks for the examples! It’s fascinating to read about your rules and consider the mechanisms you use, so thanks for sharing. I still find it a tad complex for my liking, being a rules reductionist by nature (and a bear of little brain). In particular the switch from non-matches to matches between steps 1 & 2 trips me up.
Thanks! I always appreciate your feedback and enthusiasm! I do like to keep things simple too but I am obsessed with innovating as well. I’ll see if I can rejig things so there’s no switch. I’m currently looking at ways to randomly generate missions and objectives to keep things interesting, so if you have any ideas let me know.
Depends what you are looking for… Personally, I use simple d6 tables and/or playing cards to generate the terrain, objectives and forces. I recommend Neil Thomas’ book One-Hour Wargames because it includes a simple system for randomly generating reasonably balanced forces, and 30 pre-formed scenarios – food for thought even if you don’t use it. And there are tons of other examples out there.