It’s been a while since I’ve touched my current Deathzap campaign – the war for the planet Jendar between the Jendari Collective and House Baronor.
The previous battle is here and had led to the invasion of the country of Haerkalia by the Jendari Collective after the failure of House Baronor’s invasion of Khef.

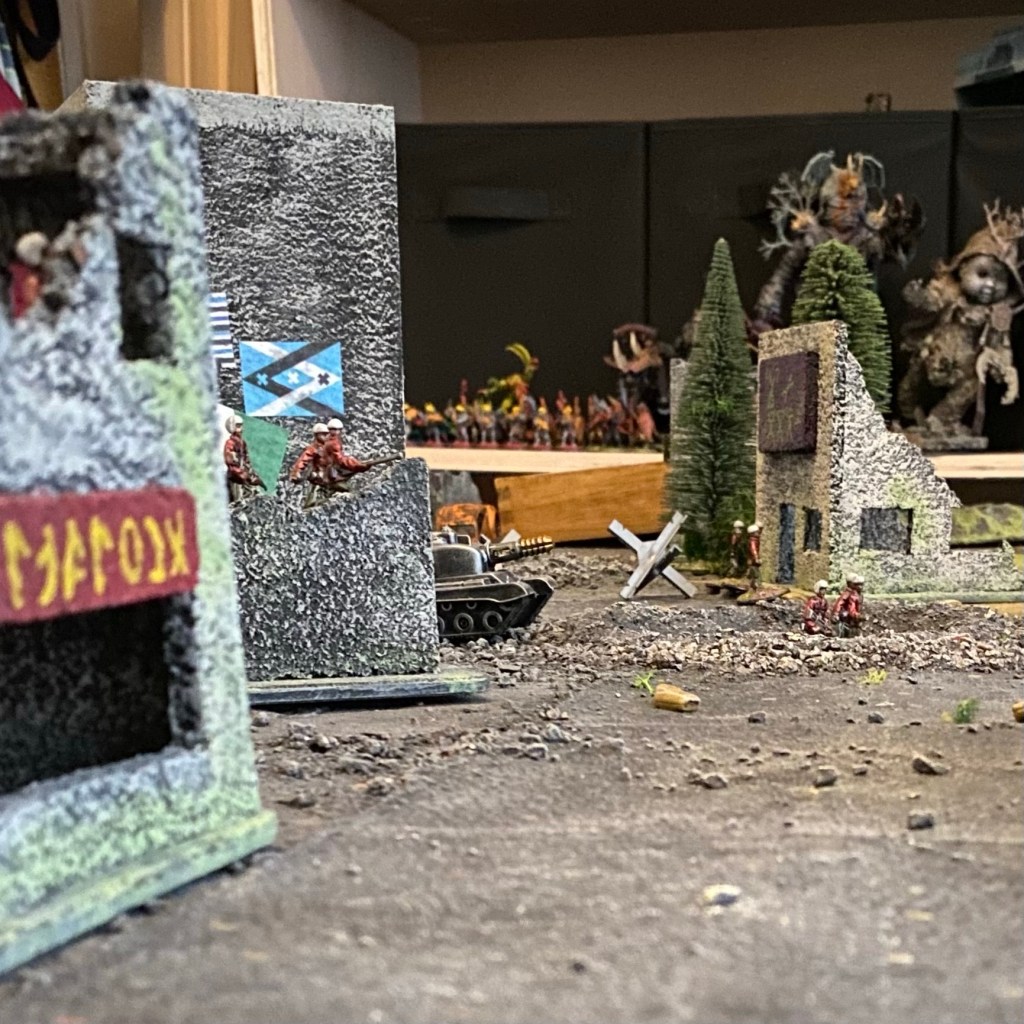
The Jendari decided an invasion from the north would be ideal allowing them to strike quickly at the capital of Thos, but the city of Alnoth stood in their way.


The rules I used were as follows:
The game is divided up into rounds. Roll off to determine who goes first in each round. Players alternate activating one unit each, each is activated once per round. When a player has activated all their units their opponent activates any remaining. Then the round is over and a new one begins.
When a unit activates roll their action die – Civillian D4, Conscript D6, Regular D8, Veteran D10, Elite D12. This determines the number of actions the unit gets. A unit that is pinned when activated becomes unpinned but can do nothing else.
MOVING
For 1 action a unit can move 1” normally, 2” on a road or ½” across rough ground. Vehicles and Beasts double all movement. Heavy Vehicles + Monsters do not double movement.
SHOOTING
To shoot the unit spends a number of actions. A unit can only fire once per activation! Average the no. of actions spent and the no. of figures in the firing unit (figures with repeaters count as 5, grenades as 3 within 12”), this is the no. of shooting dice (D6s). Only units armed with destroyers and grenades (within 12”) can shoot at vehicles and monsters, but only include figures armed with destroyers or grenades. Roll all the shooting dice – a hit is scored normally on a 5+. 6+ if the target is in cover. 4+ if the target is in the open and within 12”. 1 hit = 1 casualty. Heavy vehicles and monsters need to be killed 3 times to be removed from play.
The target unit can make saving throws using their action die, saving on a 4+.
If a unit is reduced to half of its starting strength by shooting it routs, remove all remaining figures from play. If a unit does not rout, but took casualties roll their action die, on a 4+ they carry on as normal. On a 3 or less they are pinned. If a unit is pinned twice they rout.
MELEE
When two units come into base to base contact, pair up each figure with an opponent. Resolve each pair, rolling the action die of both fighters, with the higher roller killing their opponent. Reroll ties. Pinned units get -3 to their melee rolls. If one side outnumbers another, each previously unpaired figure is then paired up with a survivor from the other side and combat is fought again. Continue in this way until each figure has had the opportunity to fight at least once, then combat is over.
Monsters roll a D20 unless facing off against another monster in which case they use their action die.
The side which took the most casualties is completely destroyed (unless the other side it entirely wiped out), remove all remaining figures, if both sides took the same amount of casualties fight again.
FORCE MORALE
If a force is reduced to half or less than half of its starting number of units the rest of the force routs.
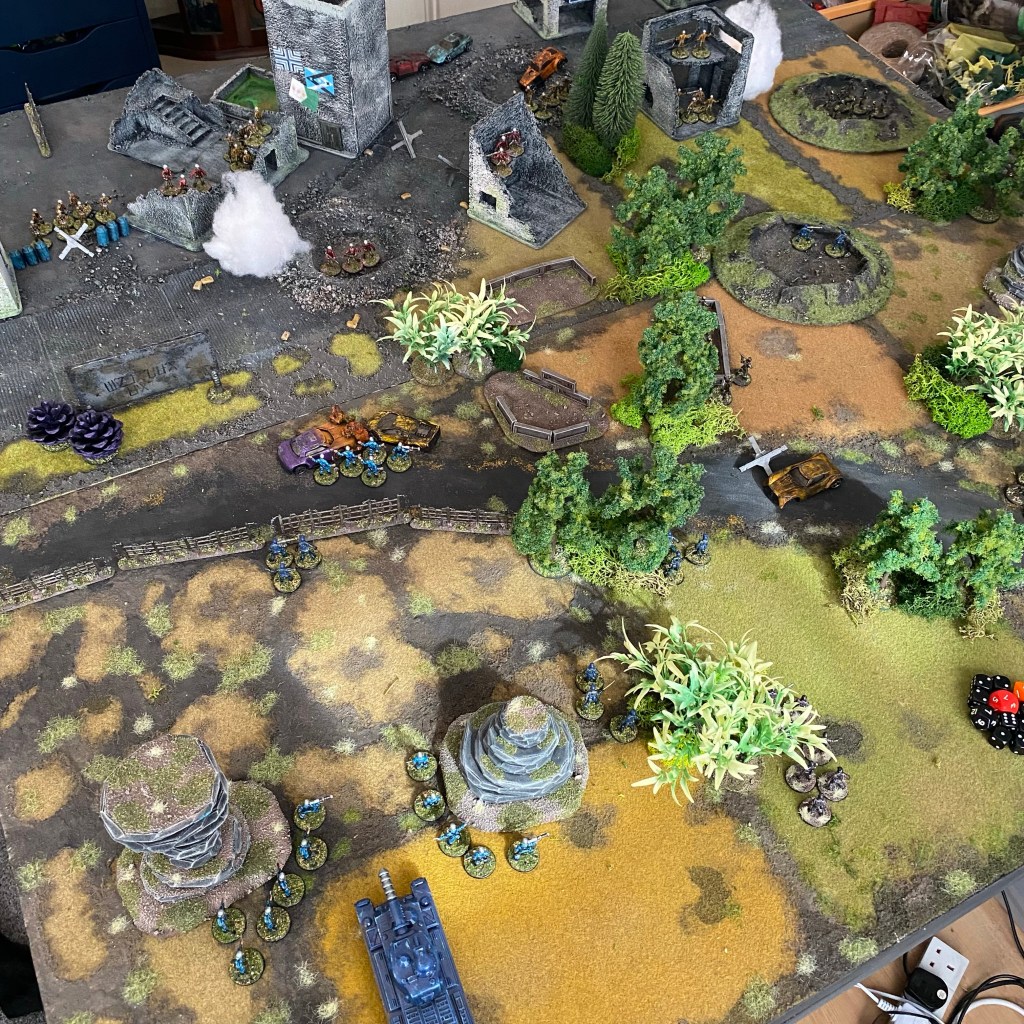
The rules themselves led to a fairly quick and easy battle, but could do with some tweaks I think. Destroyers VS buildings rules seem like a good idea as after the Beam Tanks were destroyed the Jendari essentially had no use for them. I also like the idea of adding a couple more things into the melee rules like use of grenades etc.
Since my poor old laptop has died I can’t go back and edit the old campaign map, but here’s the map from the previous post:
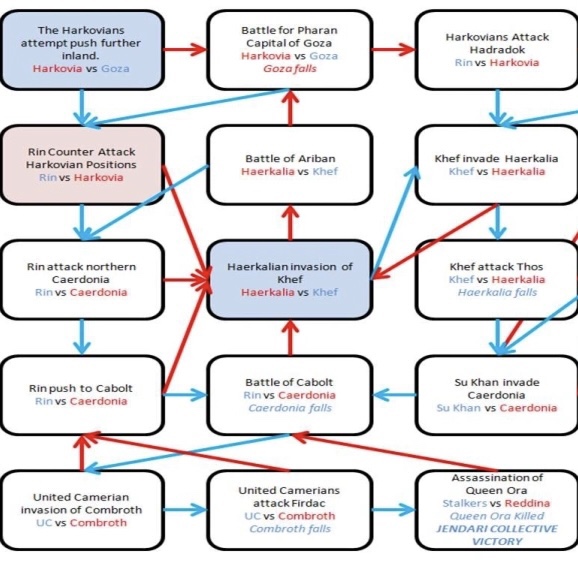
The failed invasion of Haerkalia and assumed counter attack pushes the Jendari all the way back to Khef, where the next battle will be fought.

that’s an impressive set up. I’ve literally just taken the 1/72 plunge with some WW2 items from eBay. I’m venturing into a zombie apocalypse courtesy of USEME Zombie Dawn rules. an abandoned tank museum scenario will explain the armour and the Airfix Afrika Korps become colonial military police, a faction in a pseudo 20th century end of civilisation skirmish campaign. Hopefully!
I like the painted map and the functional map as well, man of tin prompted me to buy some toy style soldiers and I partially painted them before the impulse was swept aside by another bright idea! Who knows they yet may see the light of day – your post may prove instrumental!