Here’s an intense post with all the force lists I currently use to play games of Deathzap 3. Hope you find it at least somewhat interesting (as you’ll probably notice after messing around with tables on the blogging app, I found it was easier to take screenshots of my Google Doc).
FORCE LISTS
A standard game is 400 points, with forces consisting of 2 platoons of 4 squads each, and 1 or 2 support choices. Unless stated otherwise a force can use options from the ‘Standard Supports’ list.
A smaller game can be played on a 2’x2’ board at with 1 platoon and one support choice if possible at 200 points, and using half of a deck of cards (1 suit per player), with a single Joker.
THE STATLINE
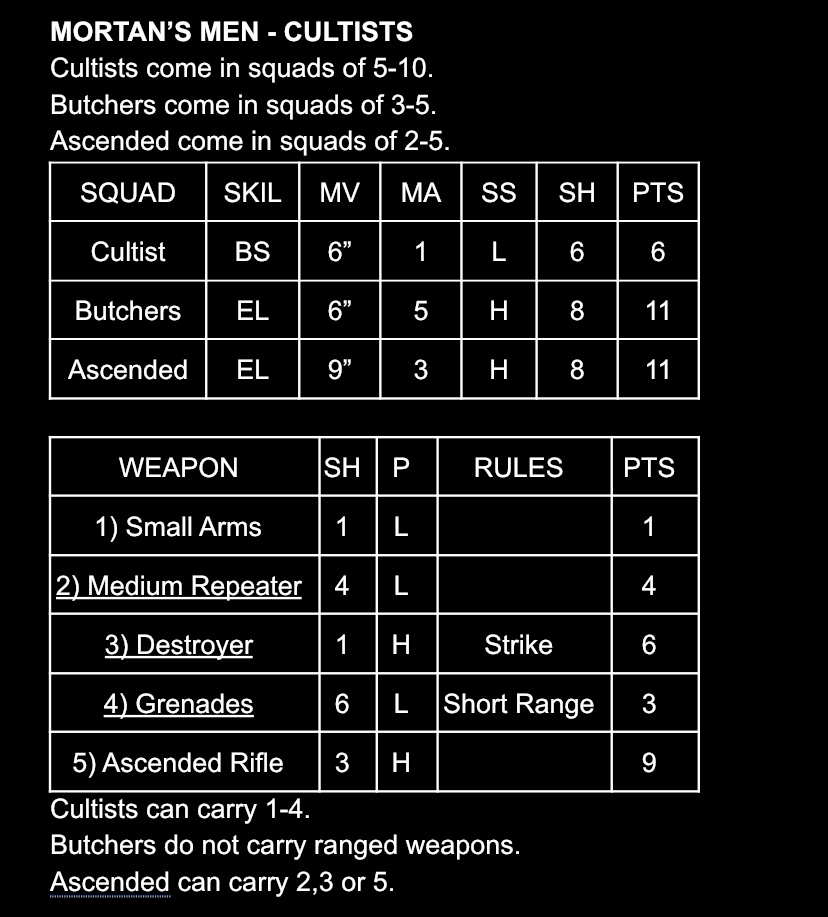
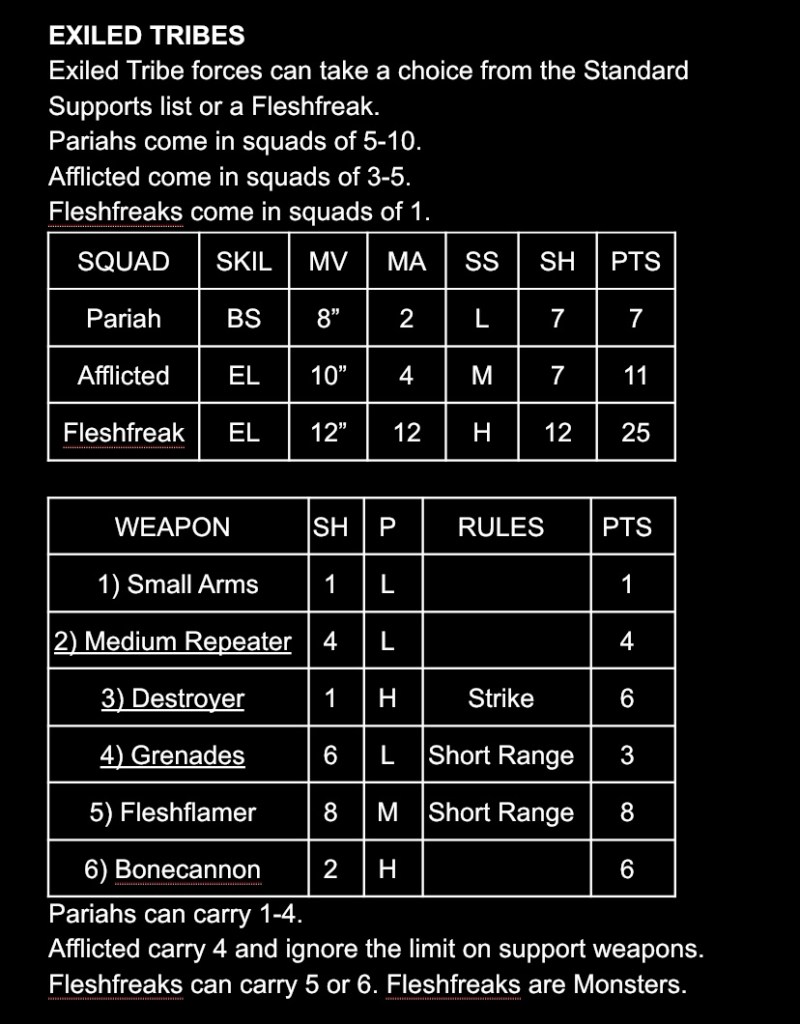
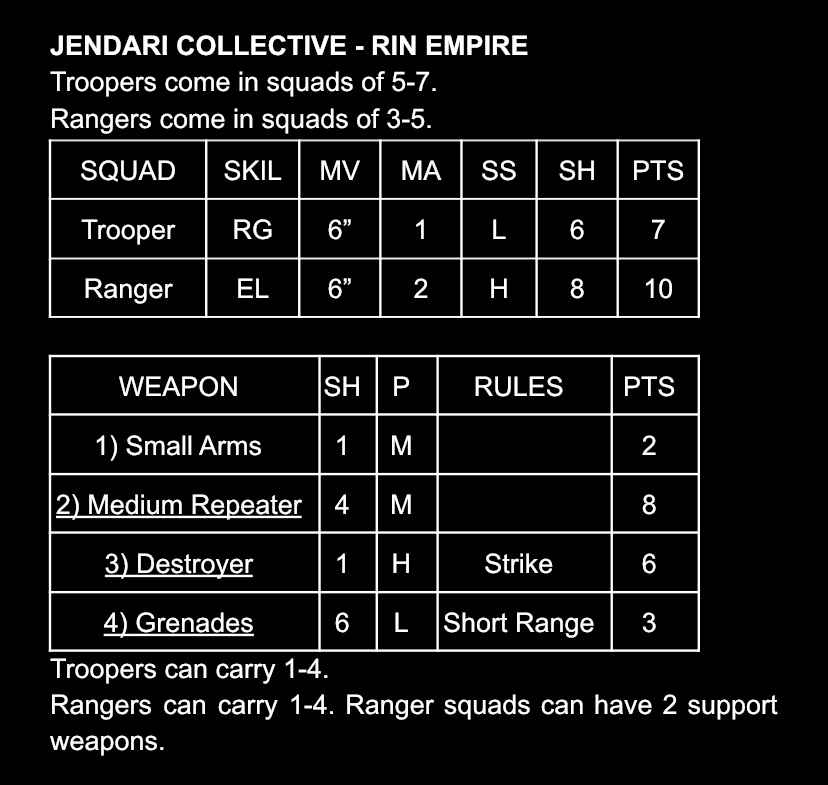
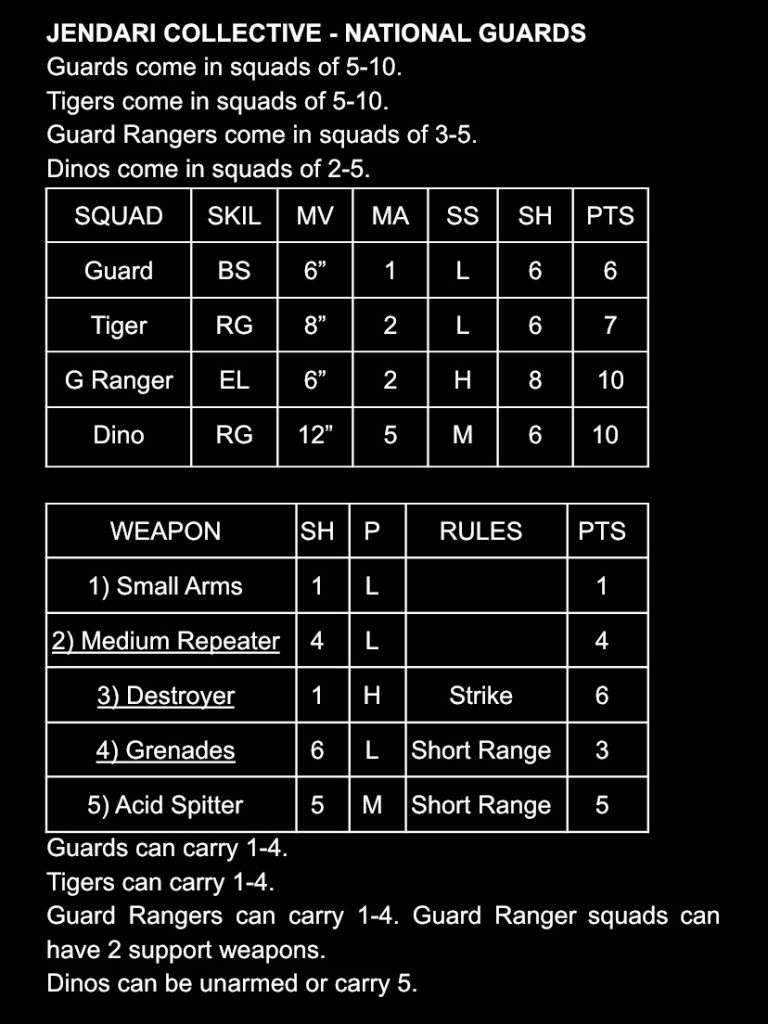
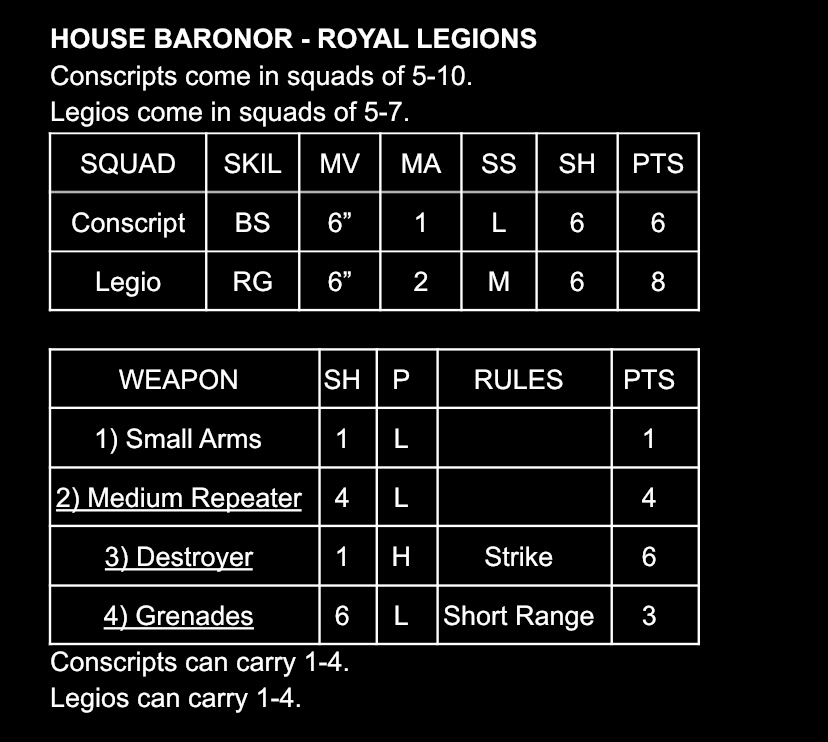
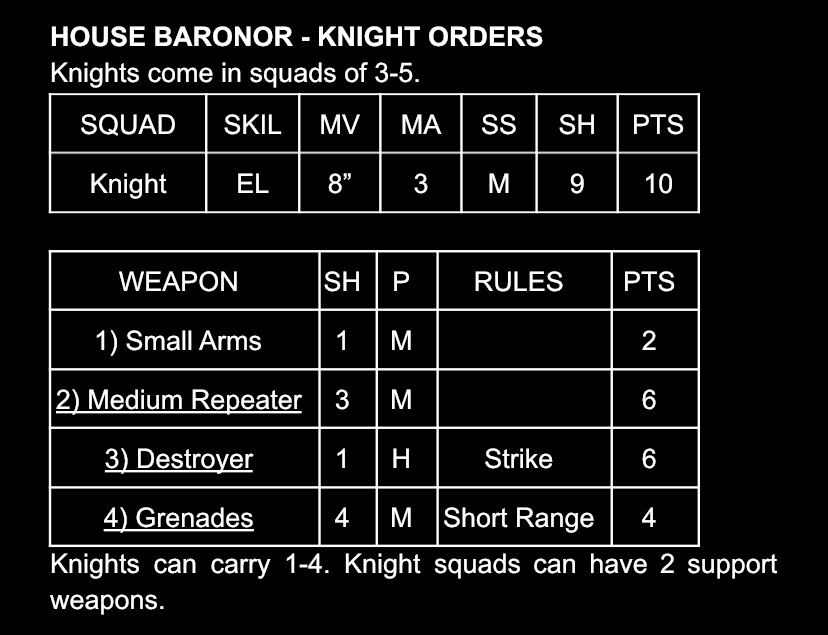
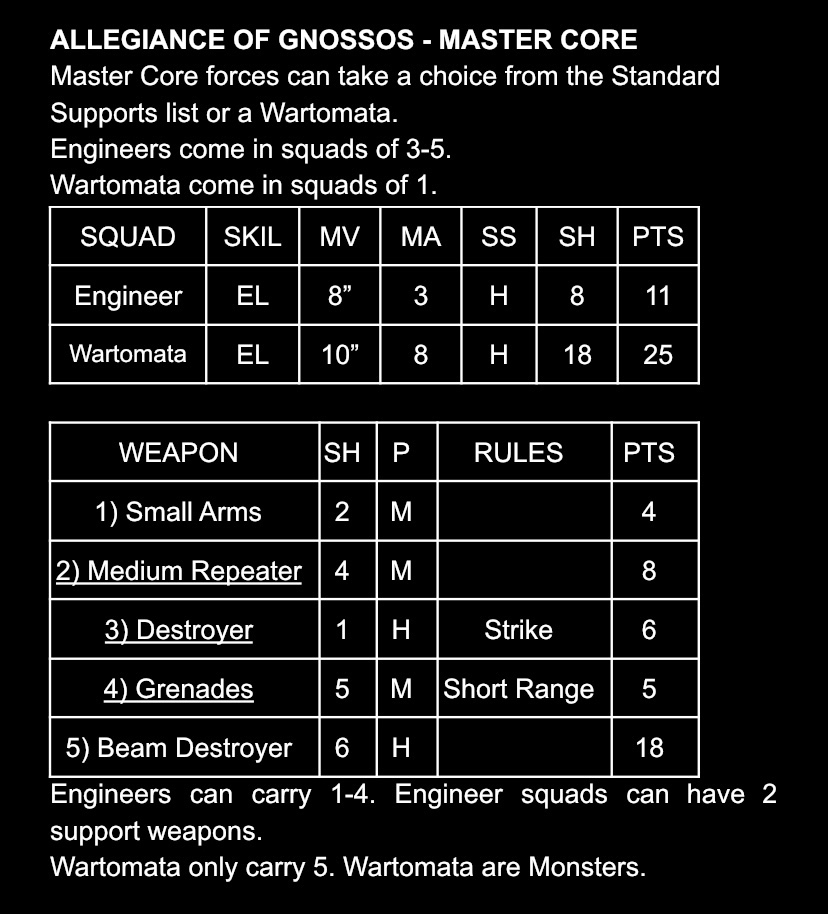
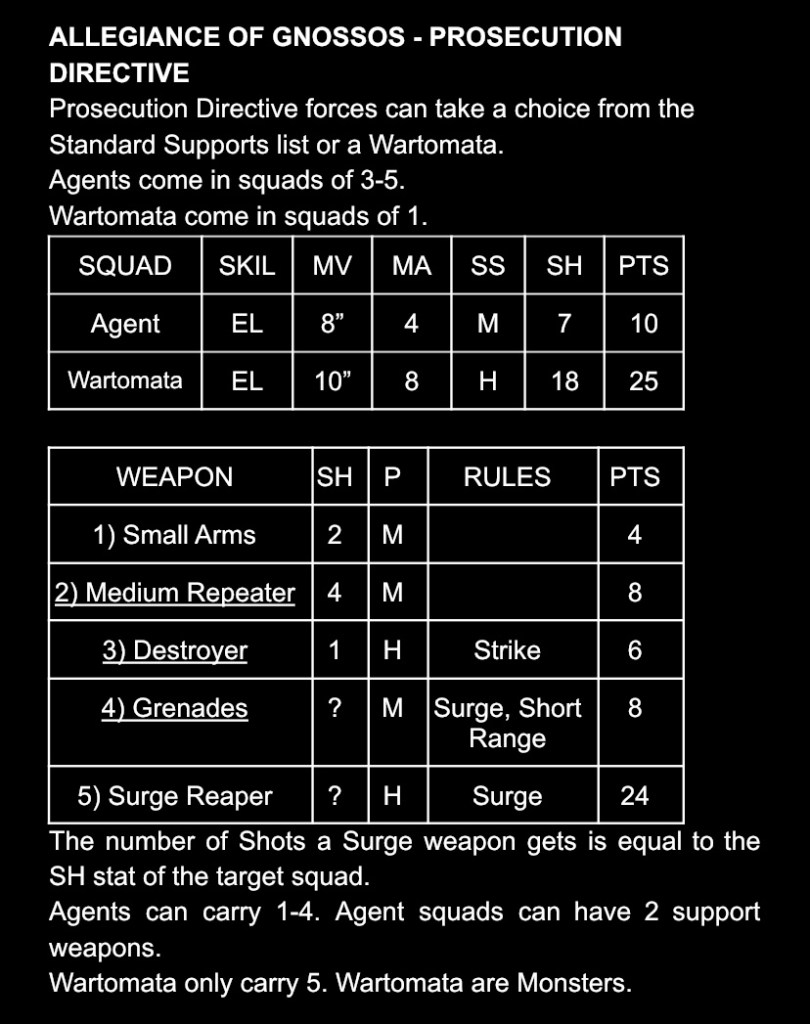
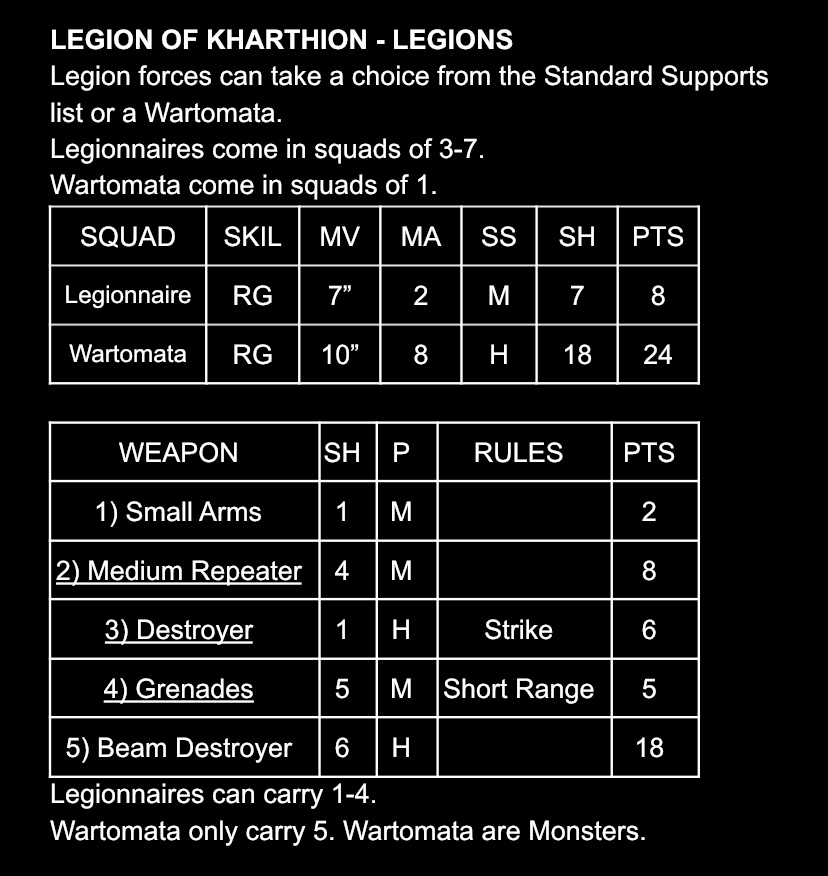
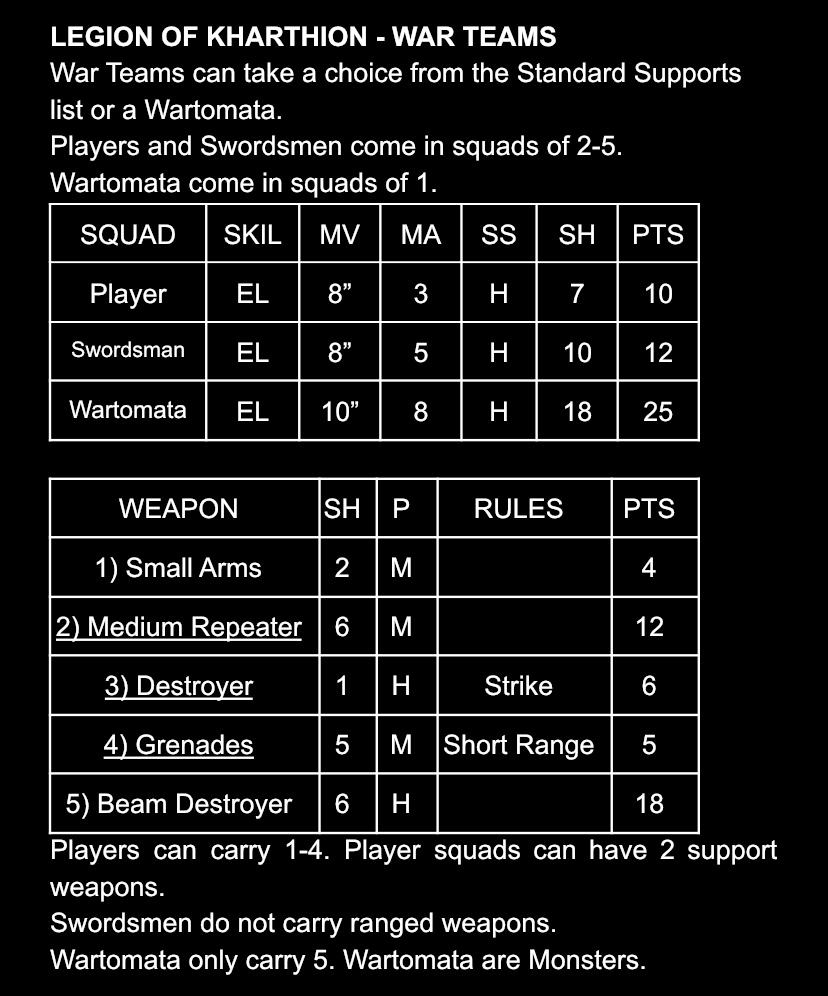
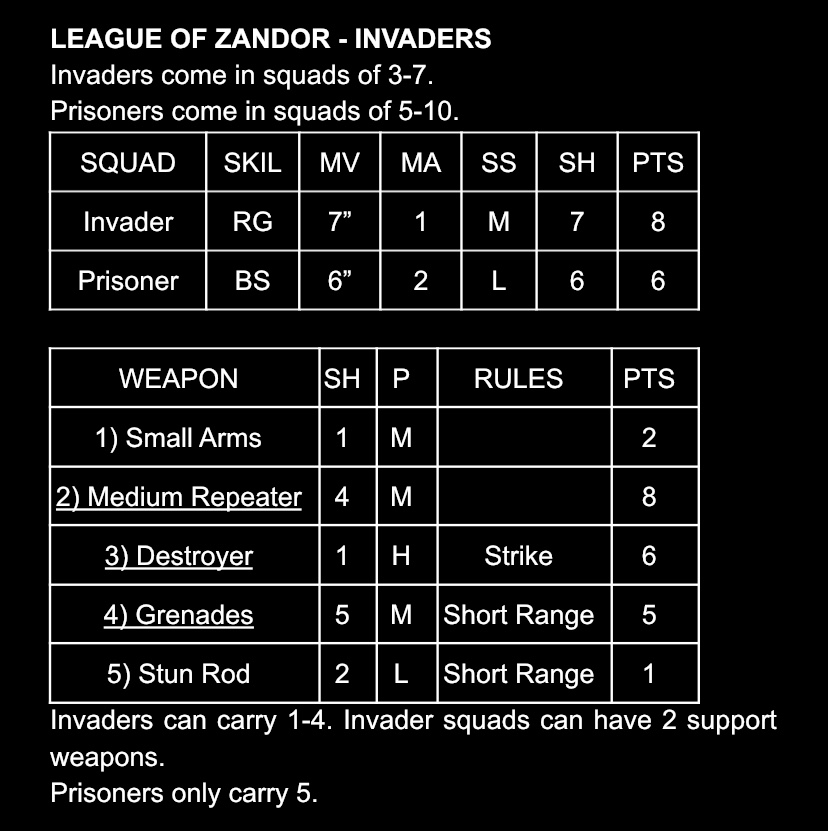
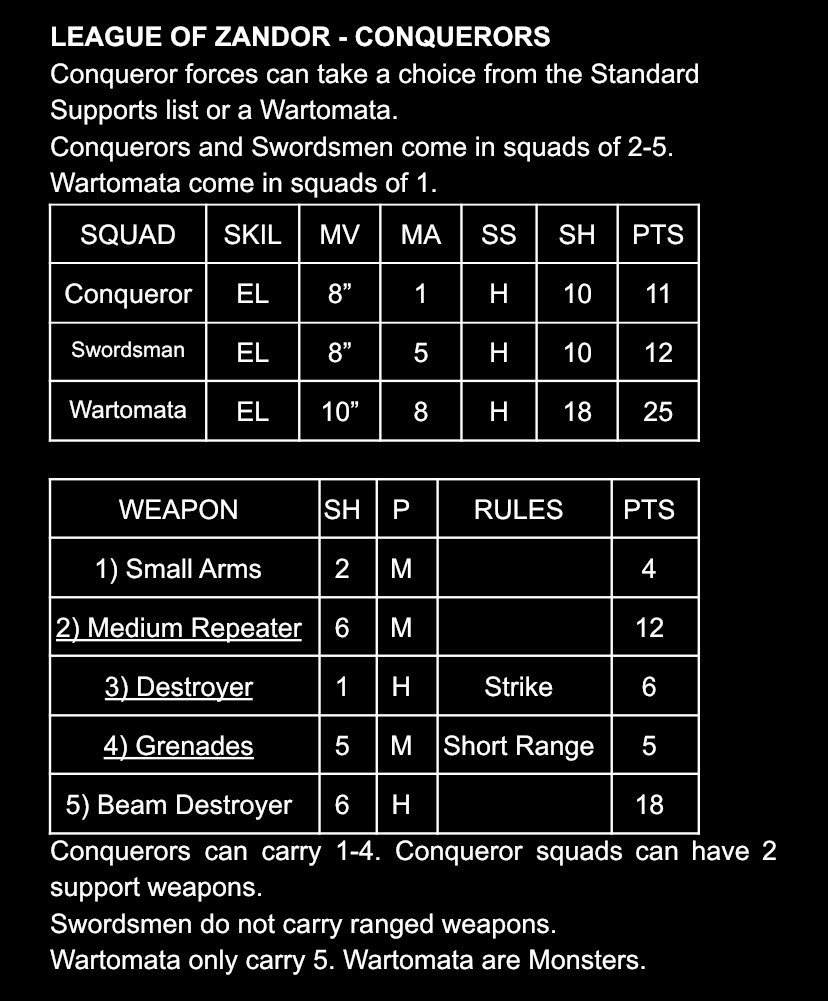
SQUADS
SKIL (Skill) – The training and overall quality of the squad (BS = Basic, RG = Regular, EL = Elite).
MV (Move) – The distance in inches a squad can move when activated.
MA (Melee Attacks) – The number of Melee Attacks (die rolls) each squad member makes when attacking an enemy squad in melee.
SS (Shield Strength) – The ability of a squad’s shields to deflect enemy shots (L = Light, M = Medium, H = Heavy).
SH (Shields) – The number of hits a squad’s shields can absorb before they are exhausted and need recharging.
WEAPONS
SH (Shots) – The number of shots (die rolls) a squad member armed with this weapon makes when shooting at an enemy squad.
P (Power) – The ability of the weapon to beat a target squad’s shields (L = Light, M = Medium, H = Heavy).
ARMAMENTS
Figures can be armed with one of the weapons listed available to them unless stated otherwise. Additionally weapons that are underlined are support/special weapons and unless stated otherwise each squad can only be equipped with one support weapon.


It’s good to see the context at the beginning and that’s a lot of detail in those tables. I guess it’s all grown over time? I wonder how much more ended up in the “cutting room floor” to get to this point?